Danilo Di Falco
3D Generalist
ABOUT
NINTENDO GAME BOY
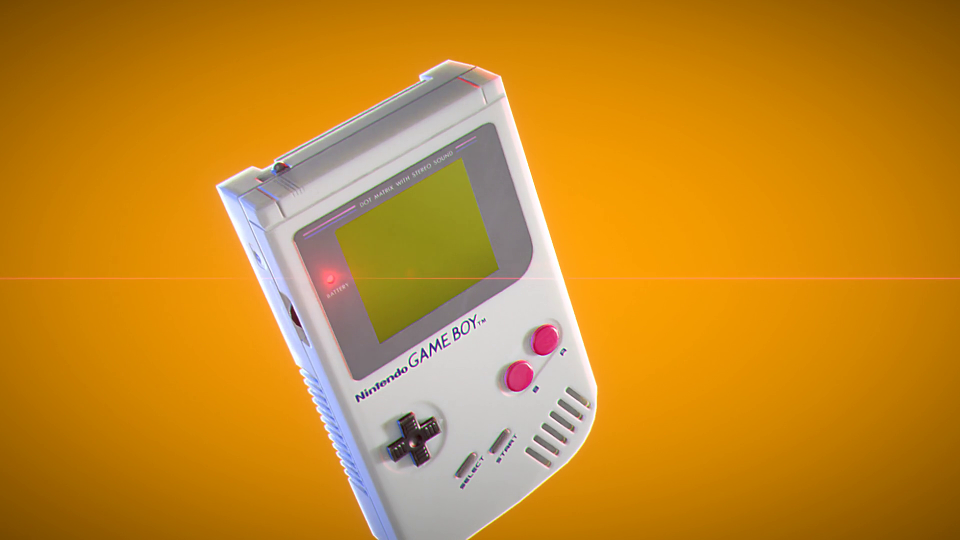
Creating an animation of the original Nintendo Game Boy
For this project I wanted to challenge myself with some hard surface modeling, taking inspiration from one of my favourite handled consoles that was with me throughout my childhood. Also, I wanted to see if it was possible to produce a professional animation from start to finish using only open source/free software.
PRE PRODUCTION
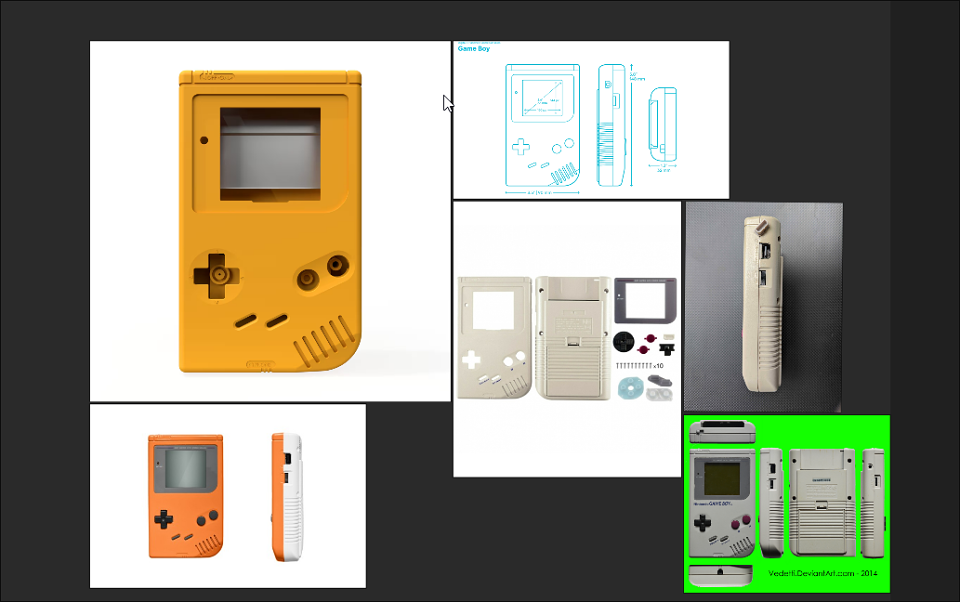
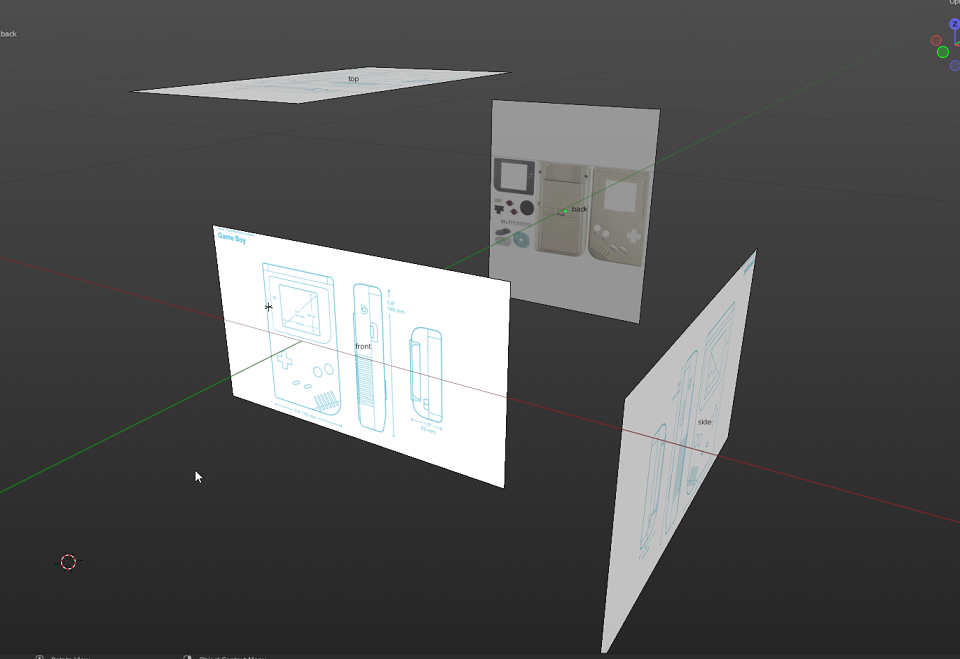
First things first: the most important step before starting a new project is always REFERENCE-REFERENCE-REFERENCE. Whether is an original character, a fantasy weapon or an existing piece of furniture, it's imperative to collect first as much reference as possible. Since the Game Boy is a extremely popular hardware (even nowadays) it was quite easy to find pictures of it and its different parts in every angle (game cartridge included) just by a quick Google Image search. I then saved the pictures I needed to their own folder and put them all together inside PureRef so I can look at them all the time using my second monitor. Also, before even starting to create our first polygon, it's important to set the reference in the 3D viewport, aligned to match the different sides.
MODELING
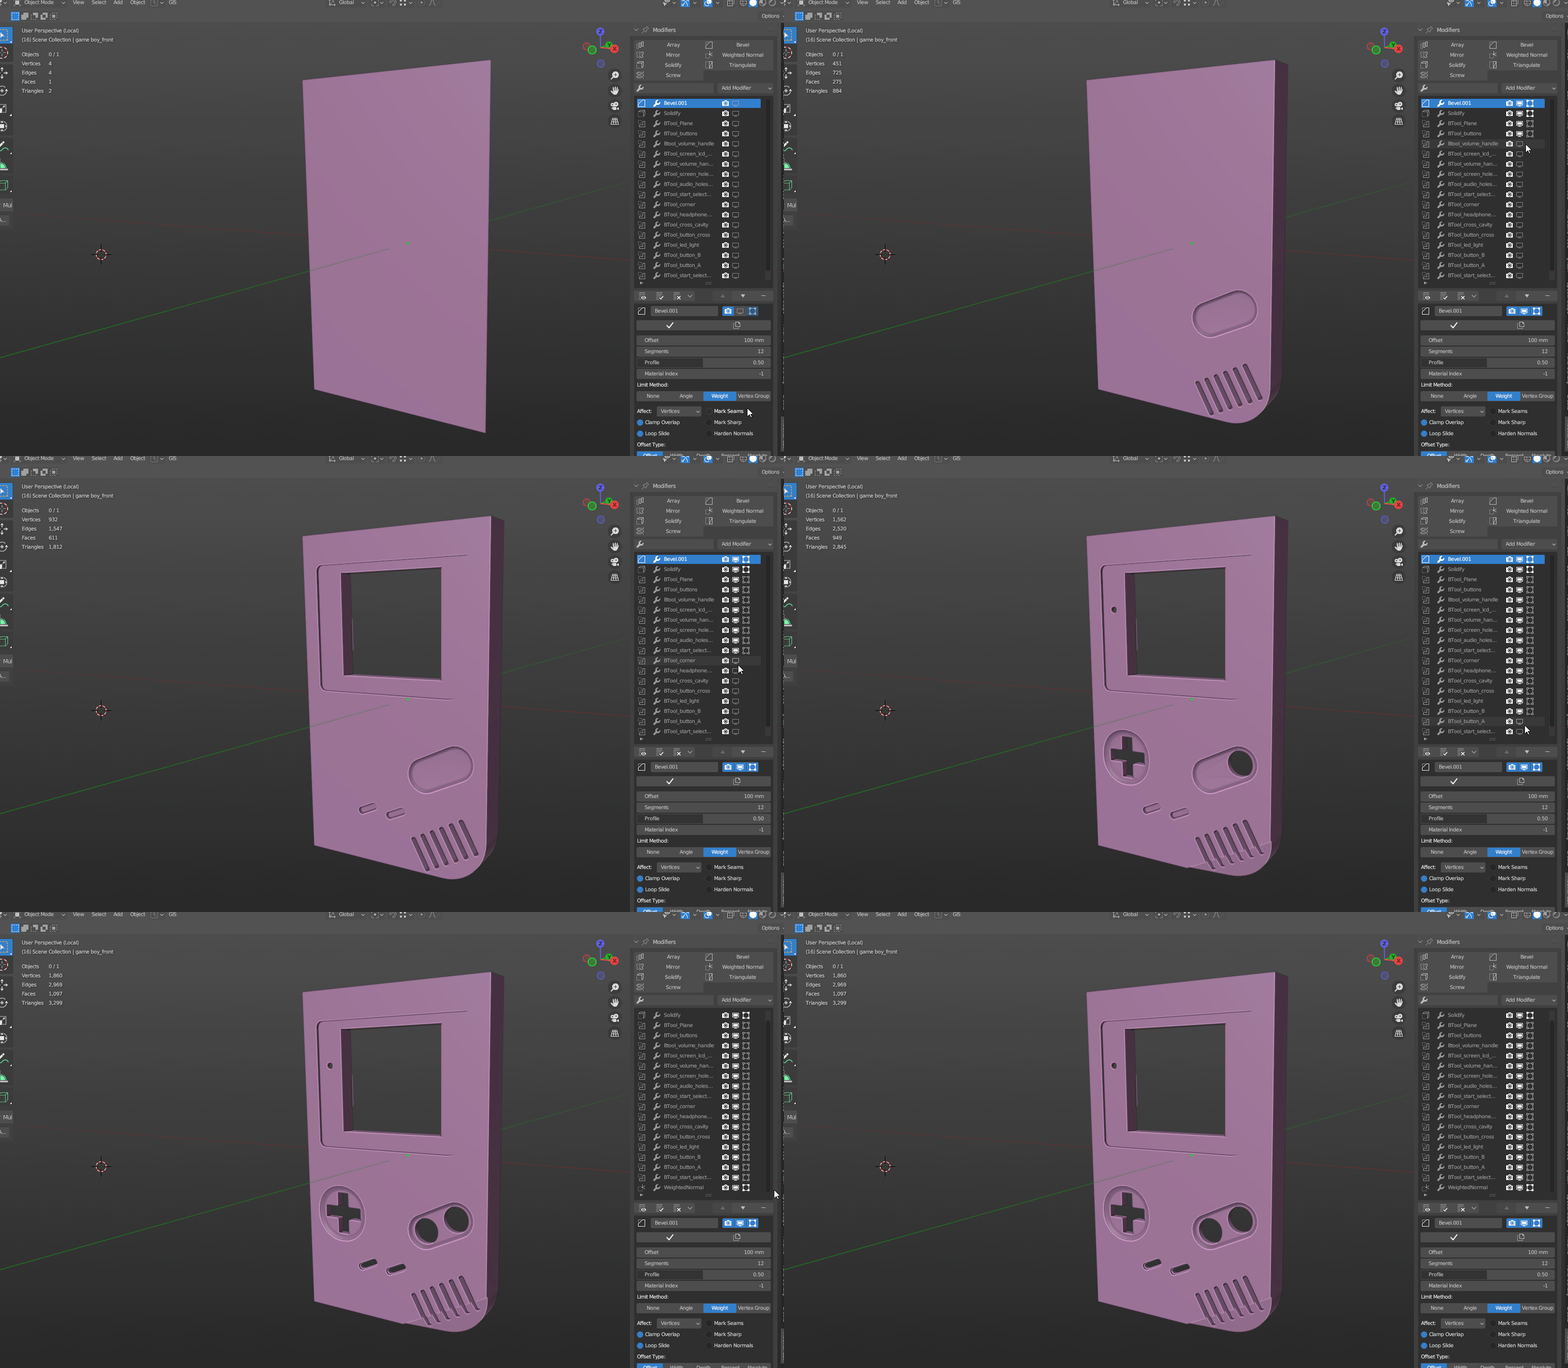
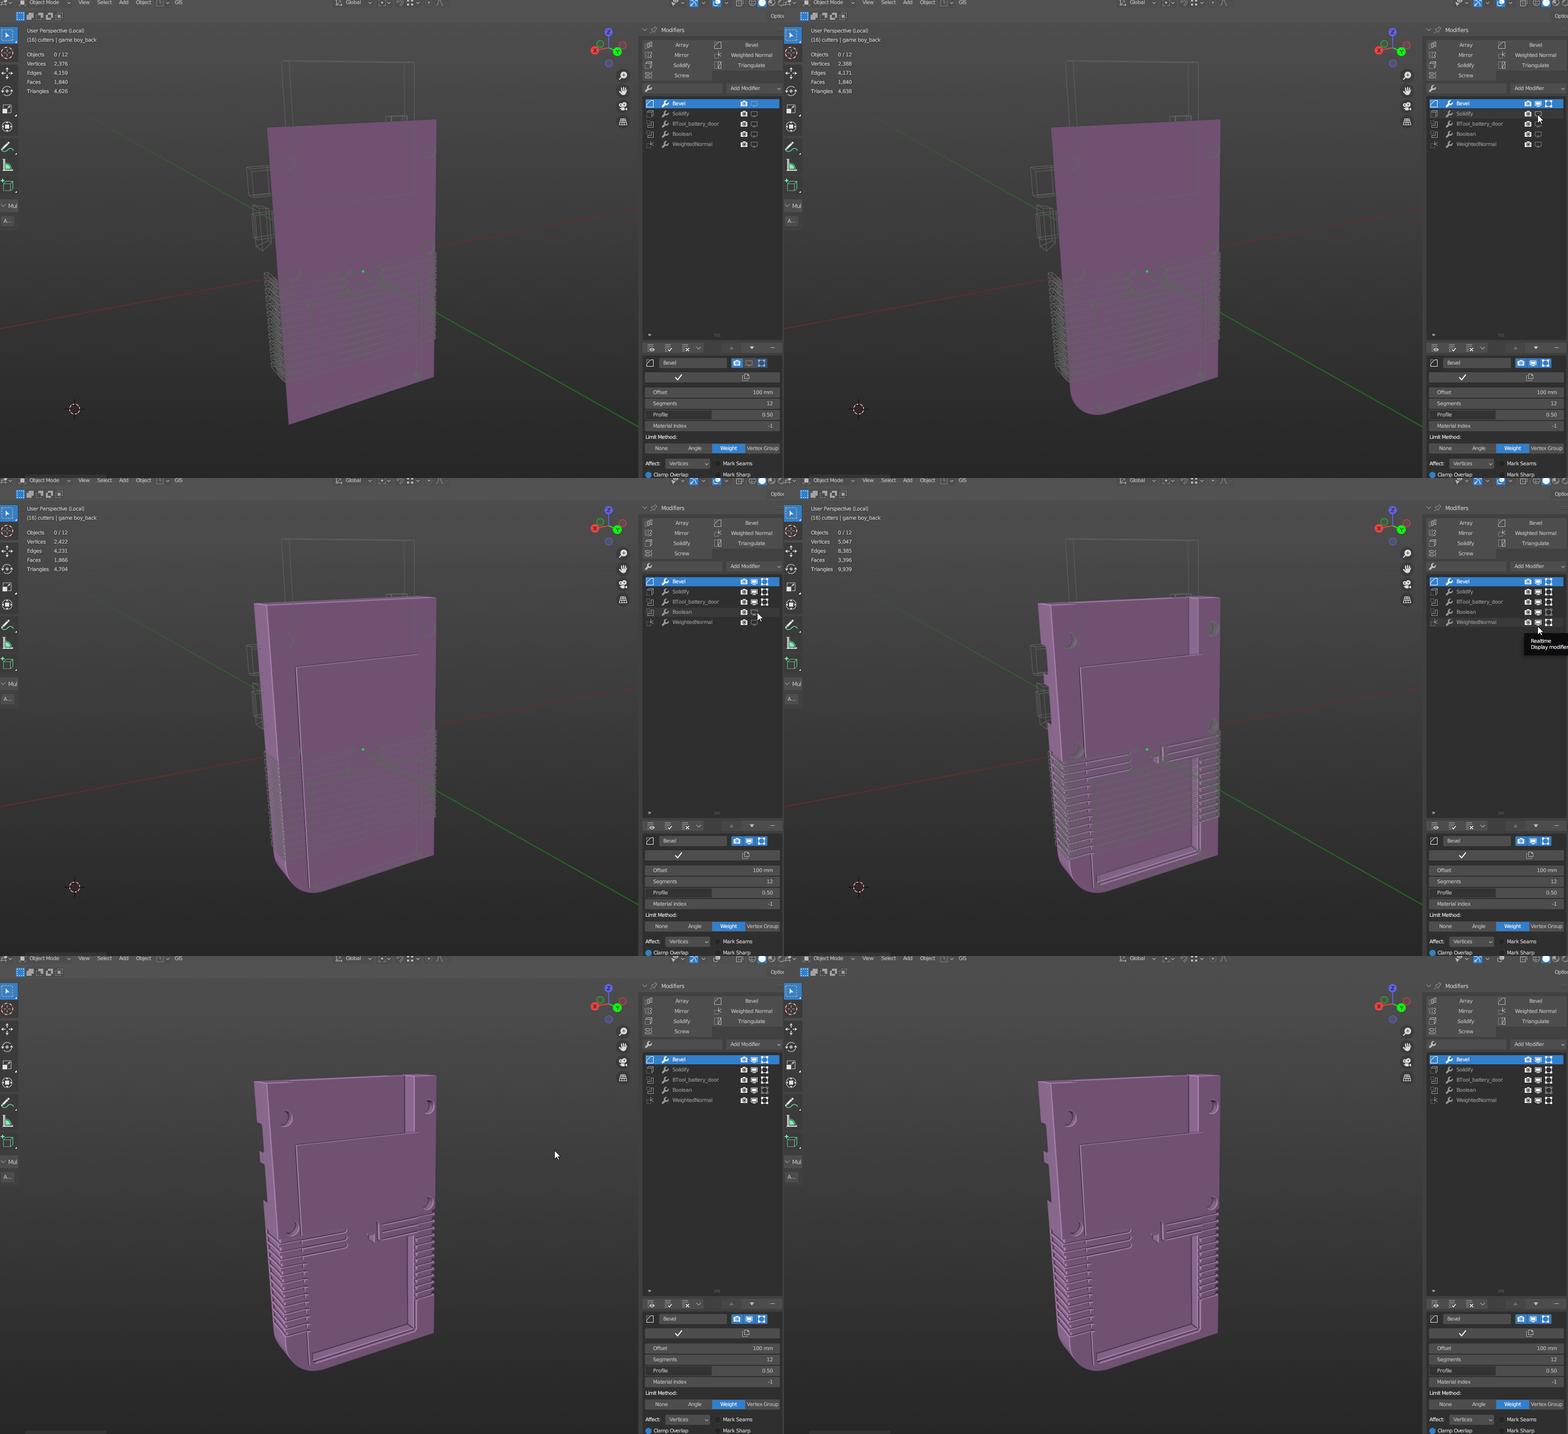
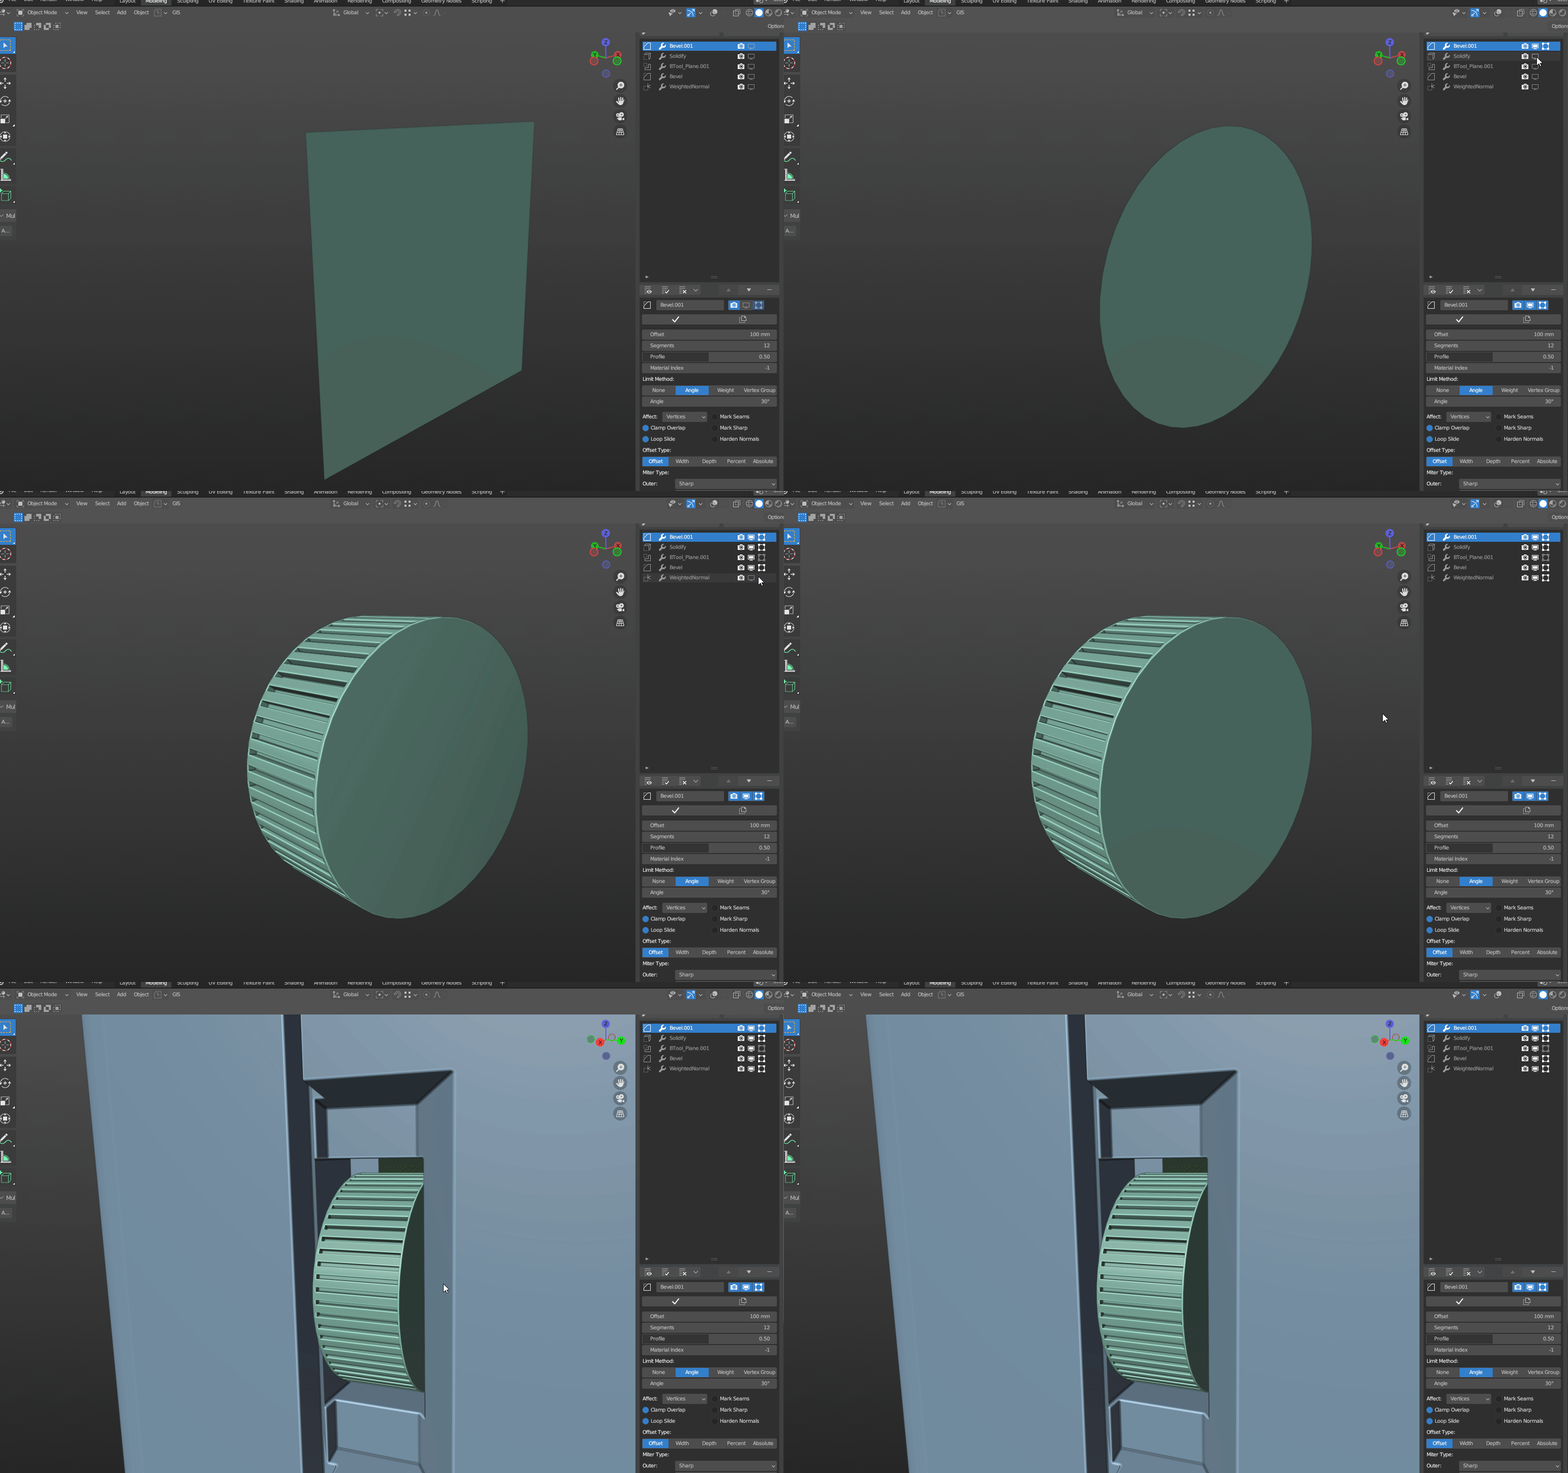
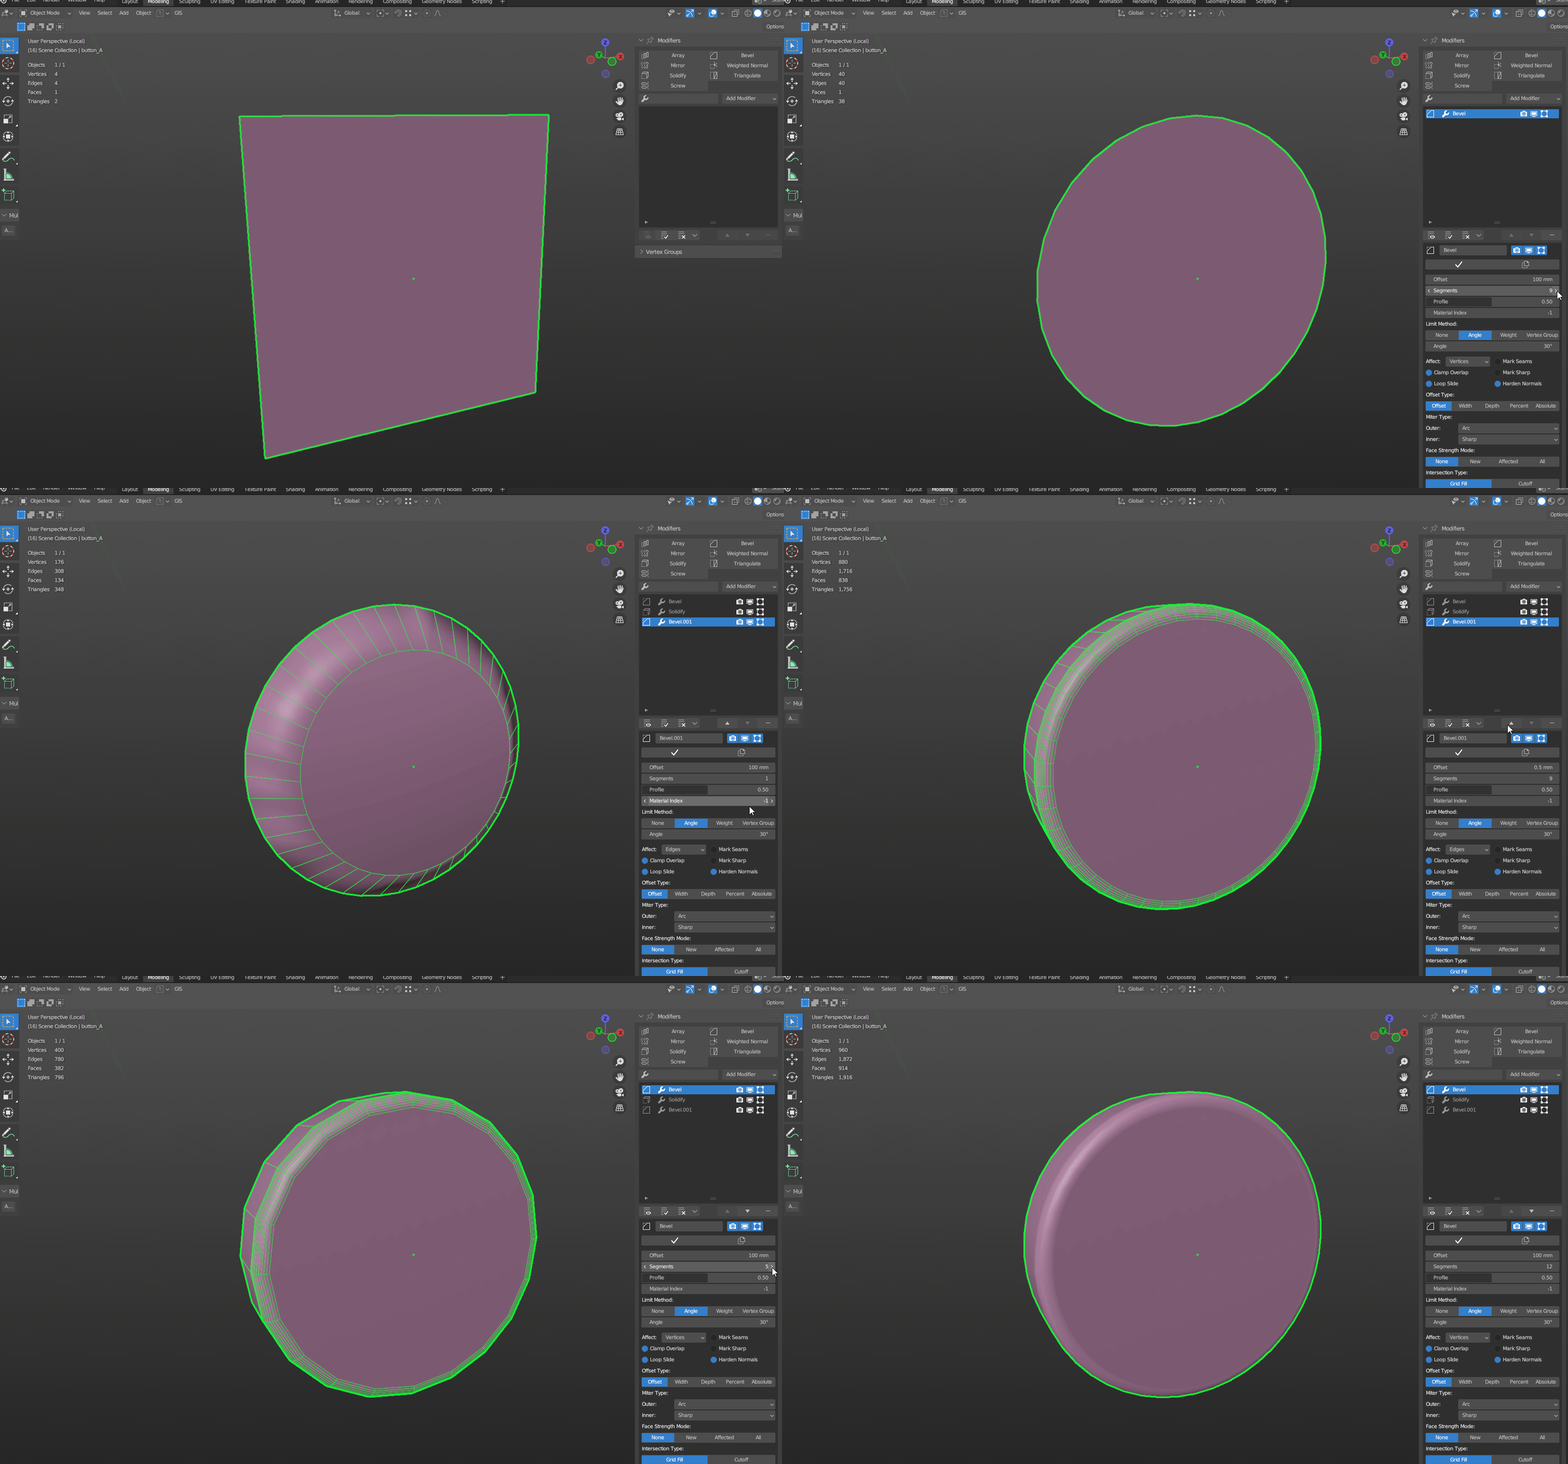
For the modeling of the Game Boy I went with the classic hard surface workflow using mostly booleans. This would let me care only about the creative aspect of the modeling without focusing too much on topology (at least at this stage). But to further complicate things, I decided to go for a non-destructive workflow, imagining to create a model that could be changed from high to low poly with a simple change of a couple of parameters.This is why I started with a simple plane (instead of the classic cube). By adding a Bevel modifier and a Solidify modifier, I was able to make the console outer shell first, followed by all the other parts. Beveling the vertices of the plane I have full control of its roundness and I can also change its subdivision on the fly, allowing me to come back later to rise/lower the polycount of each element easly if needed. The thickness can then be changed using the Solidify modifier according to each piece.
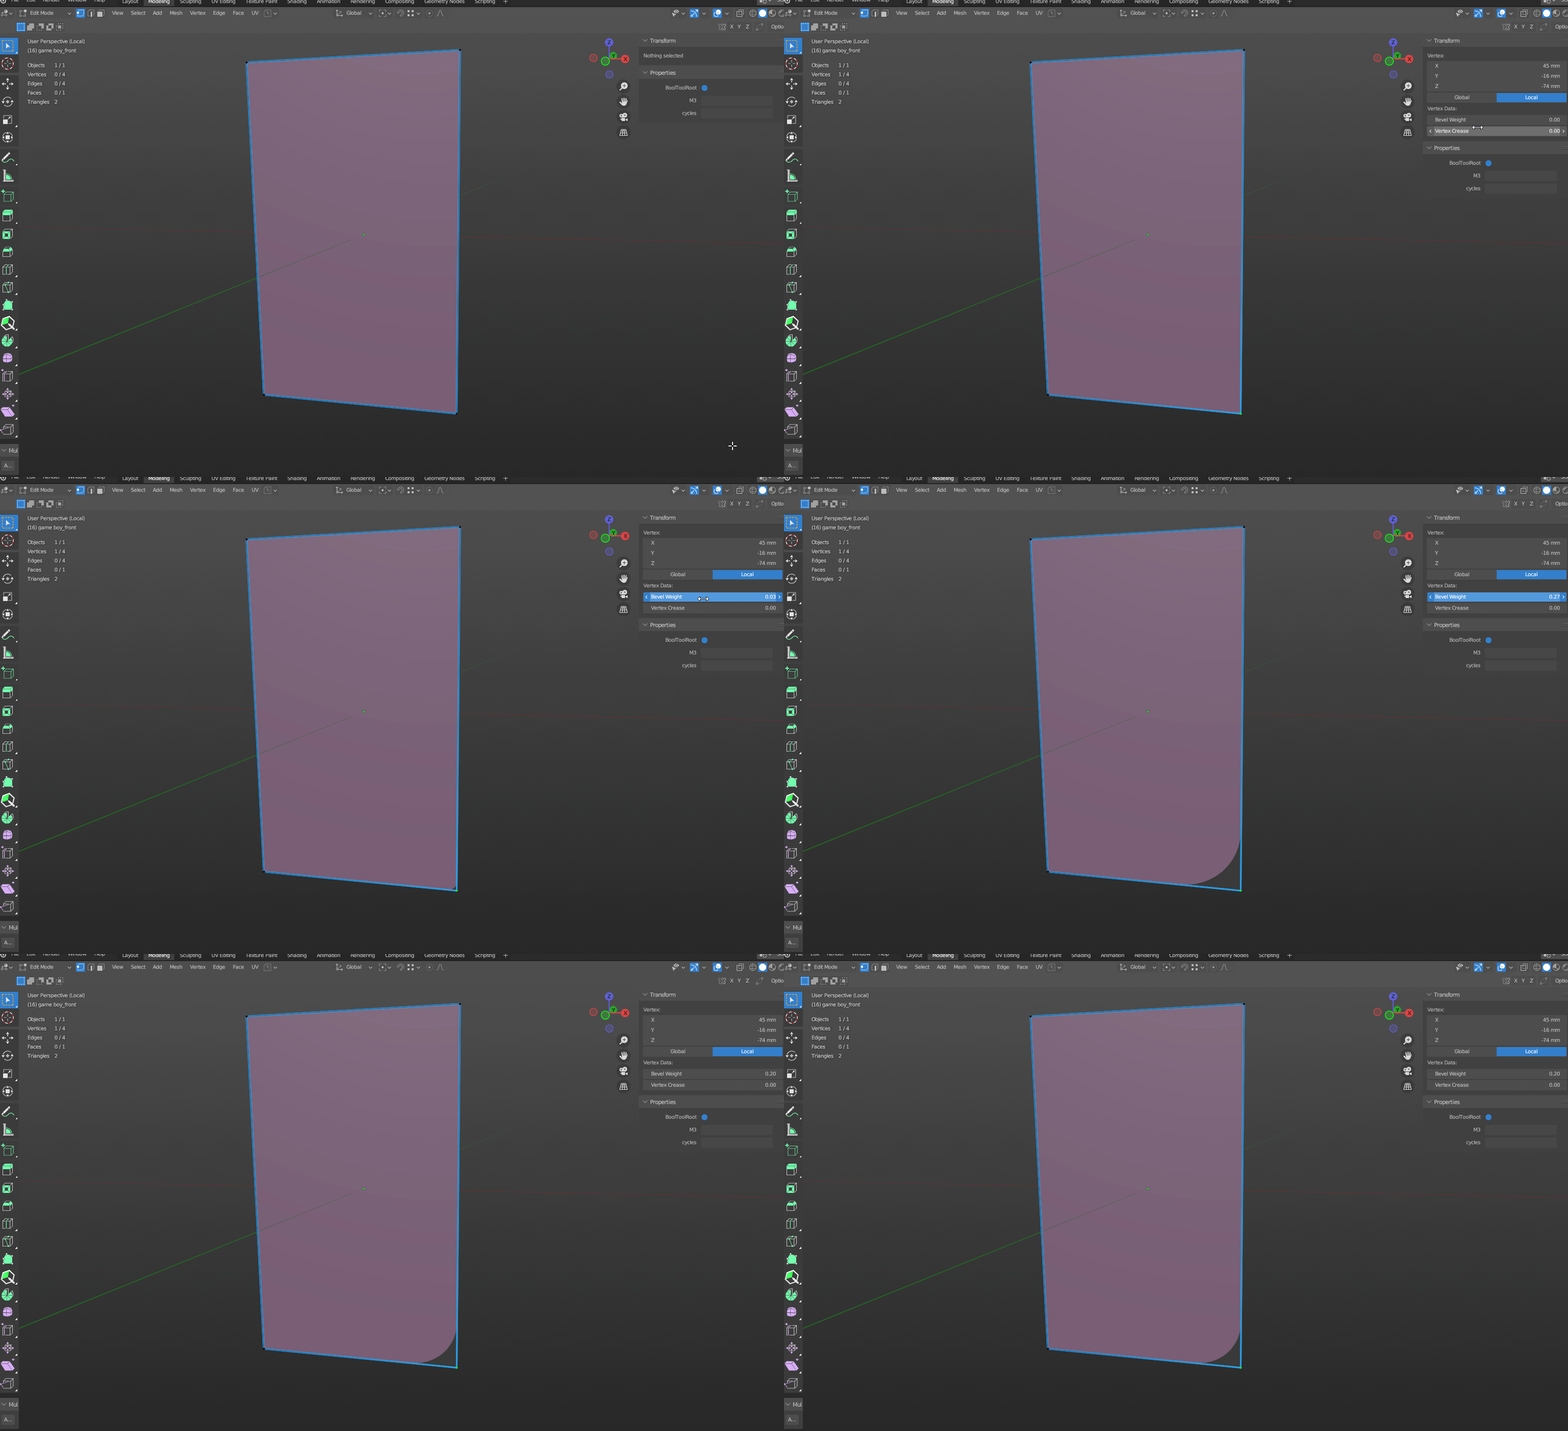
Since the Game Boy has a not-so-squared shape but with a very round bottom right corner, to stay 100% non-destructive, I used the Bevel modifier with the Weight limit method to decide a different strength for each corner, simply telling Blender how much bevel weight each vertex had to be assigned to.
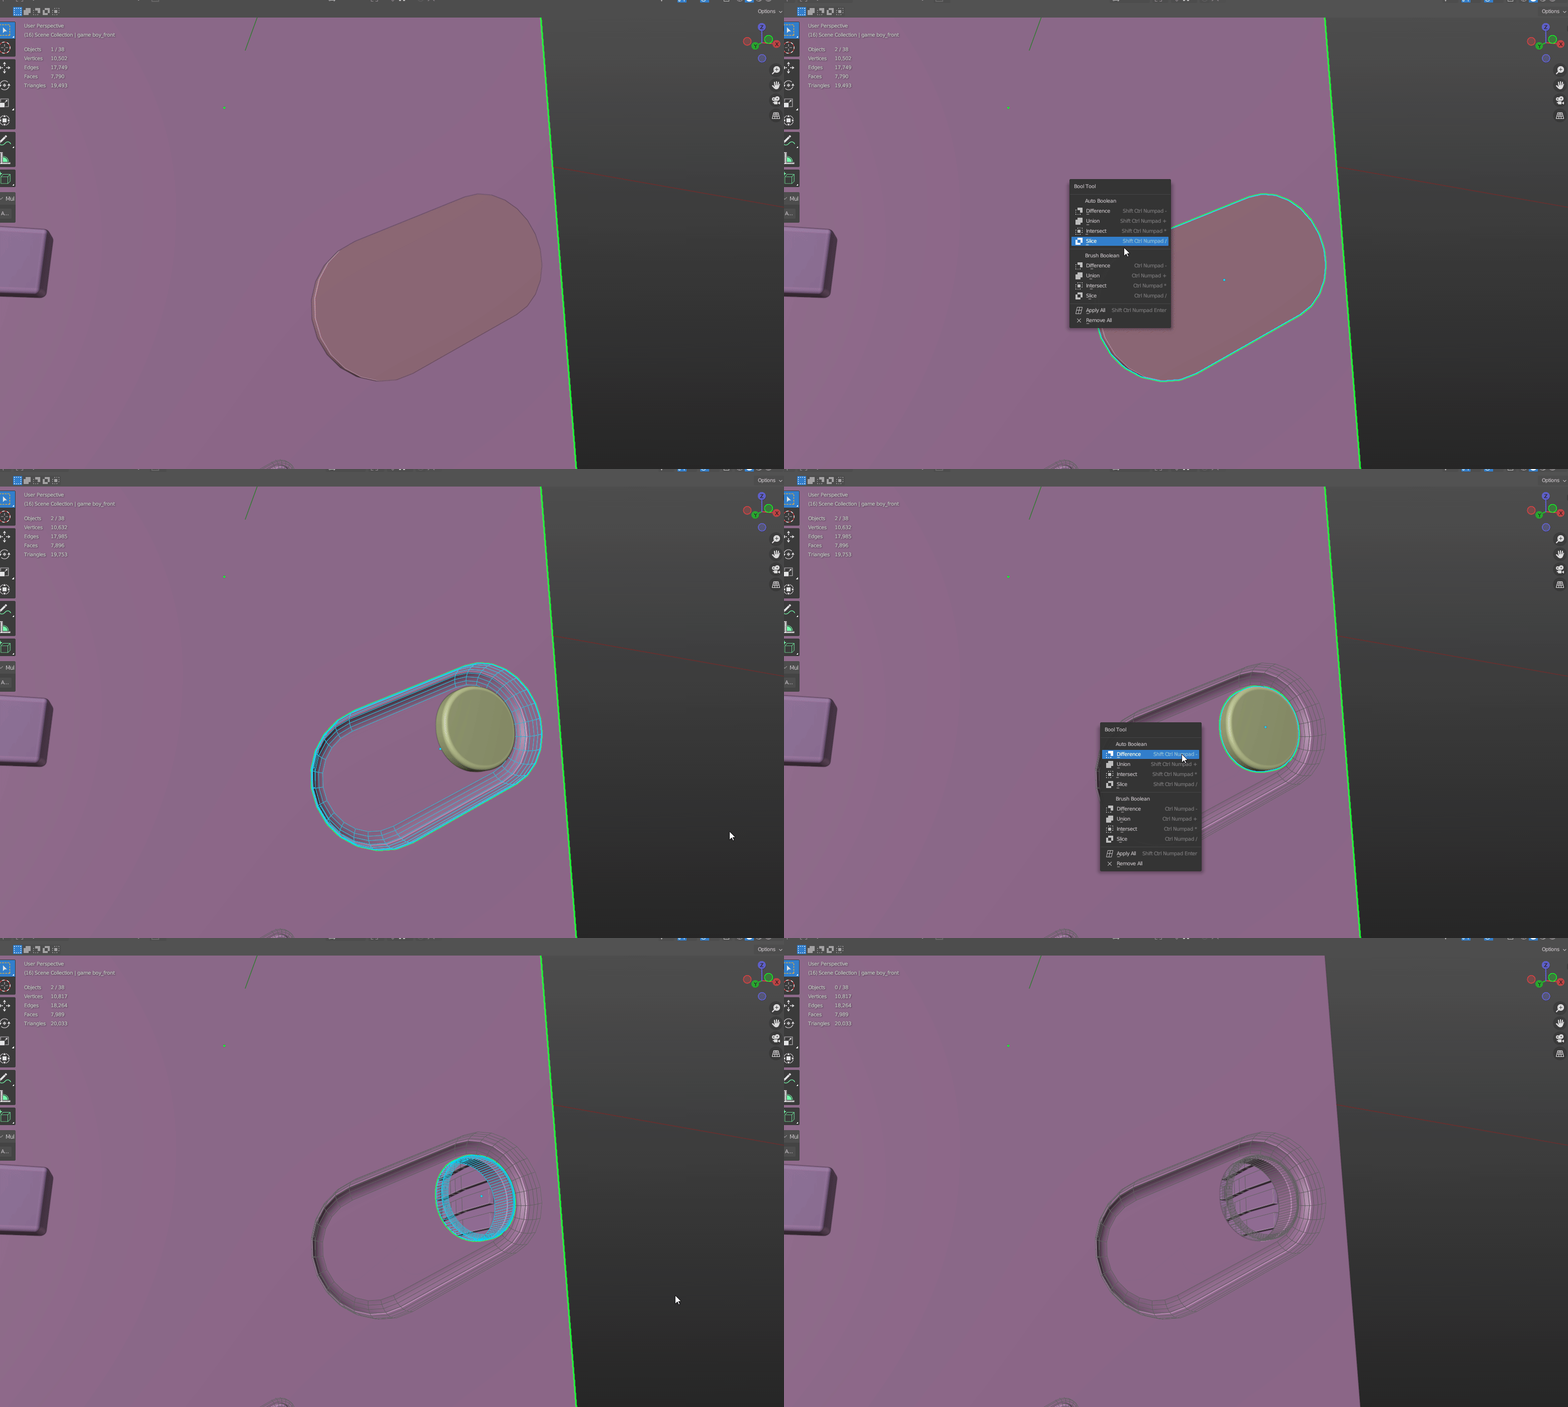
The rest of the modeling phase was about creating each element following the same workflow.For the different holes and cavities for the buttons and the screen, I used the boolean modifier. To avoid a little bit of stress and to speed things up a bit, I used the Bool Tool addon (which comes already with Blender) that allows to assign the boolean modifier to the selected mesh with a quick keyboard shortcut.
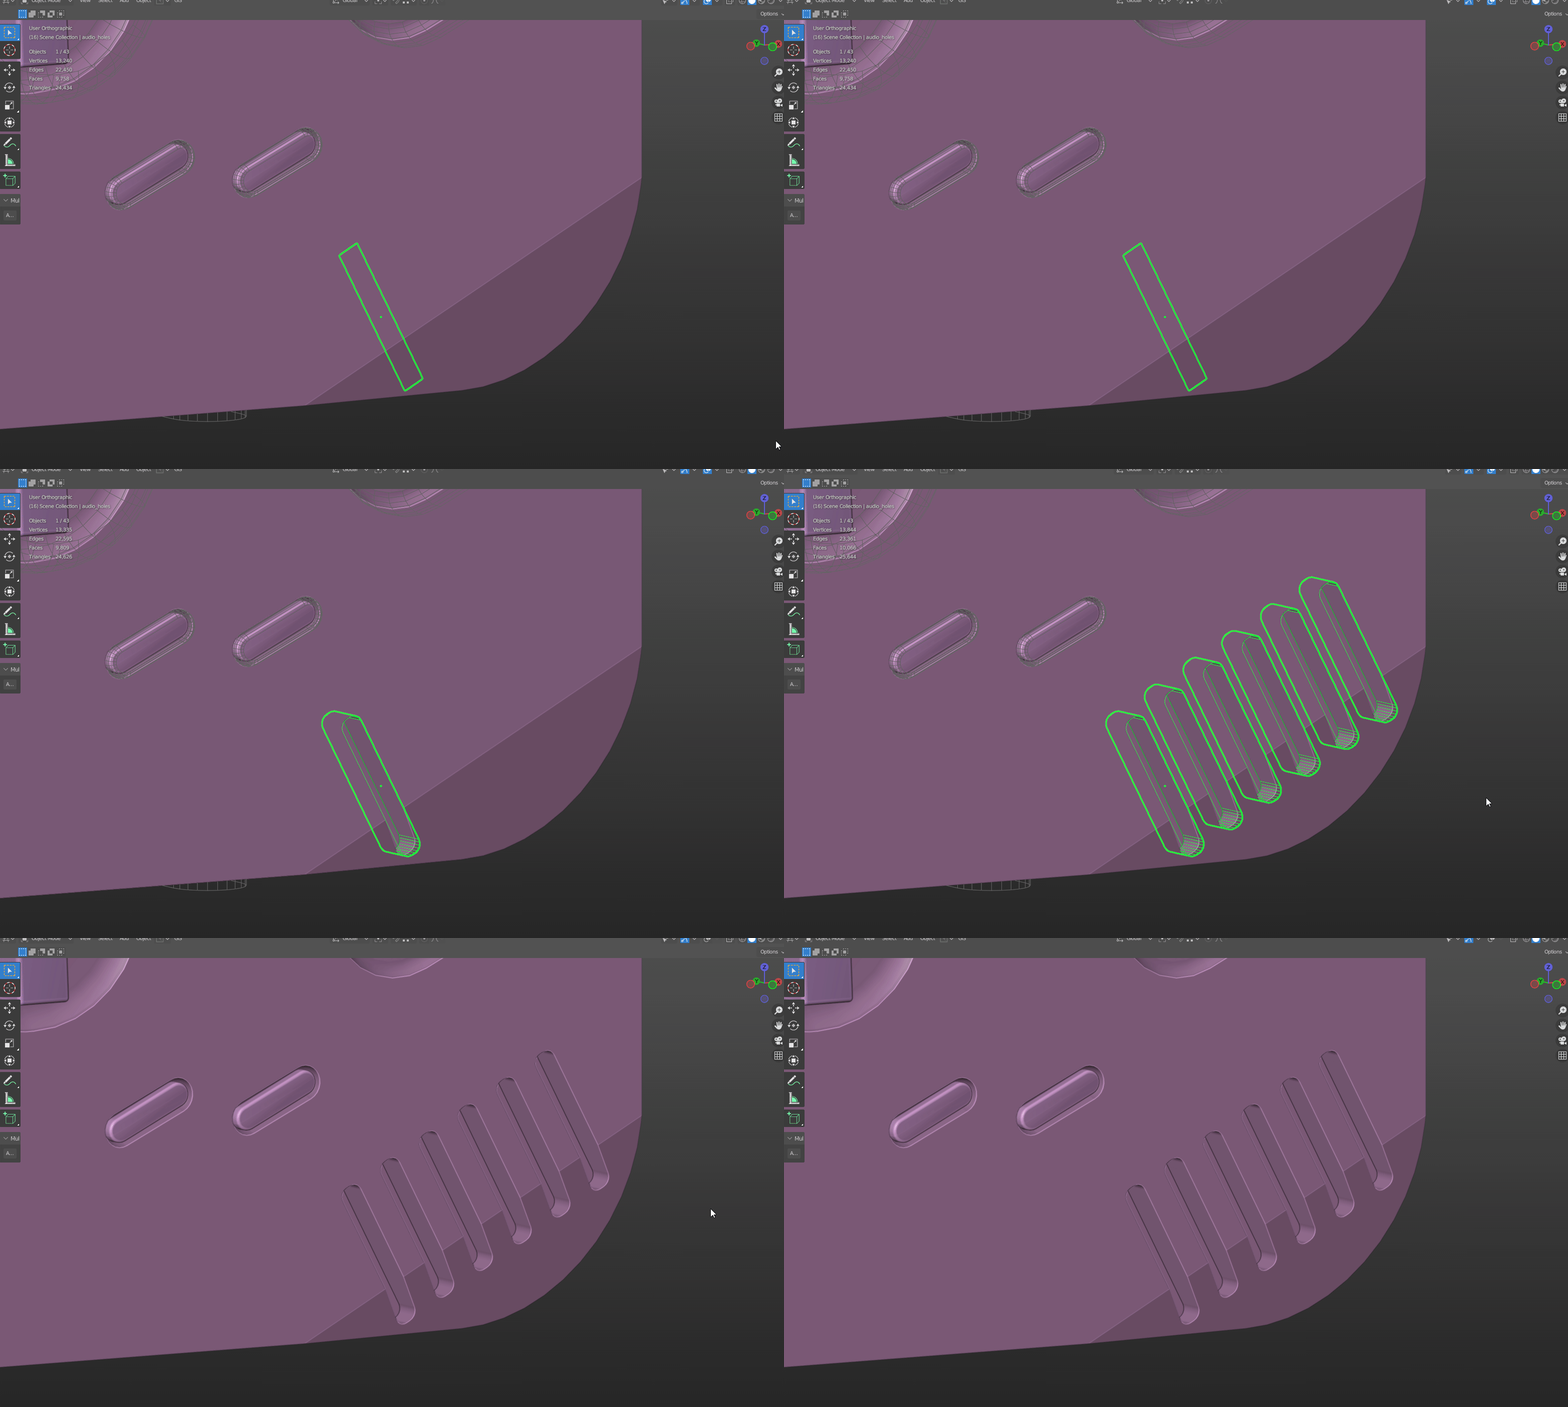
Same applies with the audio speaker, but this time with the addition of an array modifier to make copies of the same repeating shape.
The array modifier was also being used to create the brightness dimmer on the side of the console.
Applying these techniques with the rest of the components made me finish the modeling in no time and with a little effort, knowing that I can always go back and tweak the settings to make whatever changes I need.
The next step is to apply all the modifiers to have a mesh that can be used as a high poly base for texture baking. After checking and cleaning up any artefacts that the application of the boolean modifier may carry, I then applied some other modifiers to obtain an higher poly version of the same mesh. Specifically, I used a combination of the bevel, subdivision surface, remesh and corrective smooth modifiers, depending on the different pieces. Also, to avoid having a too heavy model and to speed up the baking process, I apply a decimate modifier to reduce the number of polygons.
TEXTURING
After I completed the modeling part and created the high poly version of the model, it's now time to make a low poly version that can be used in a game engine if needed. Starting from the previous model, I lowered the number of segments in each bevel, then I applied all the modifiers again. After that, I manually tweaked and cleand the vertices/edges until I reached the desired polycount. During this process I tried to define what element needed to be left in the model and what can be baked after in the normal map, keeping everything that defines its silhouette.
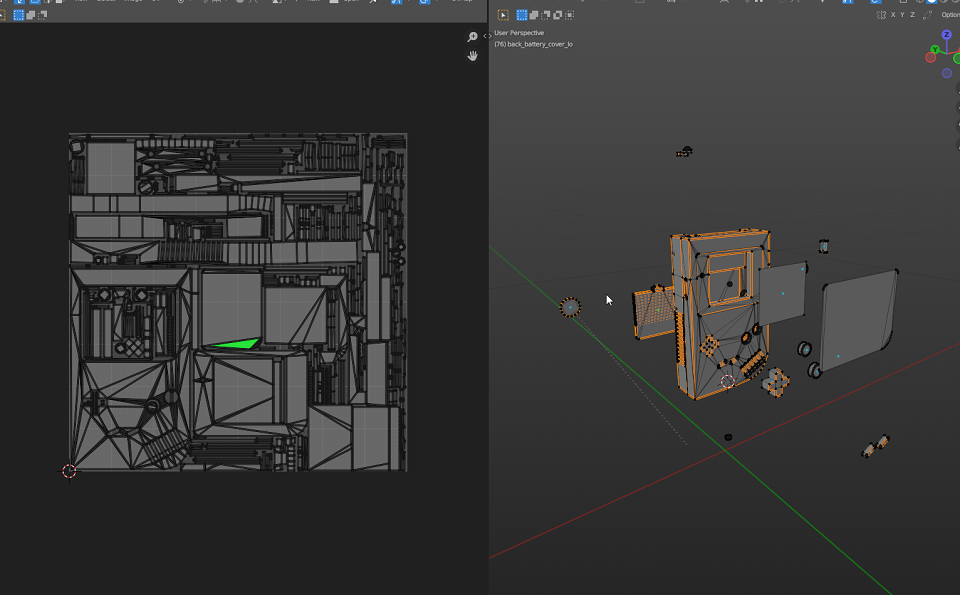
Once I decided what can be kept and what can be baked, I then proceeded to UV unwrap the whole model, starting to define the seams. Since this is a hard surface model, I separated the different islands following sharp edges. This later let me keep smooth edges even using 90 degrees angles thanks to the bevel baked into the normal map. The UV island were then packed to save as much space as possible to further optimize the model.
BAKING
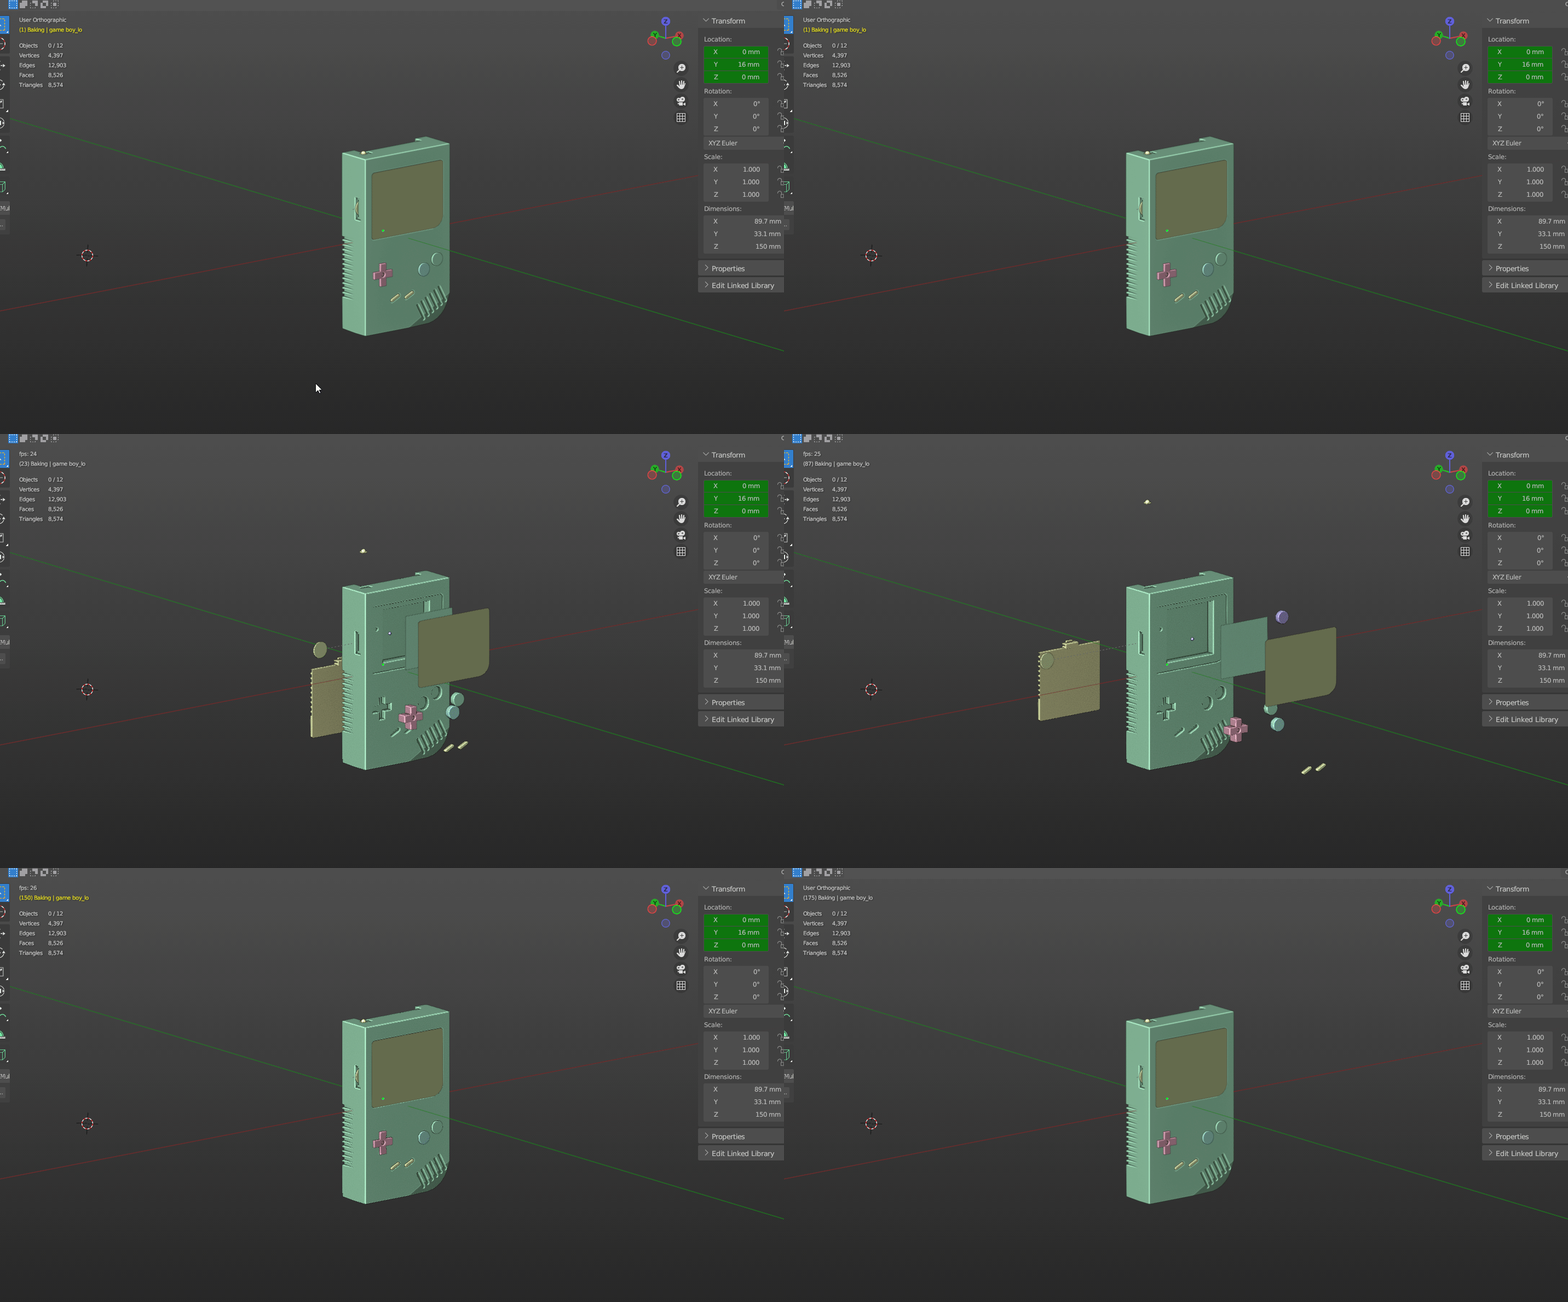
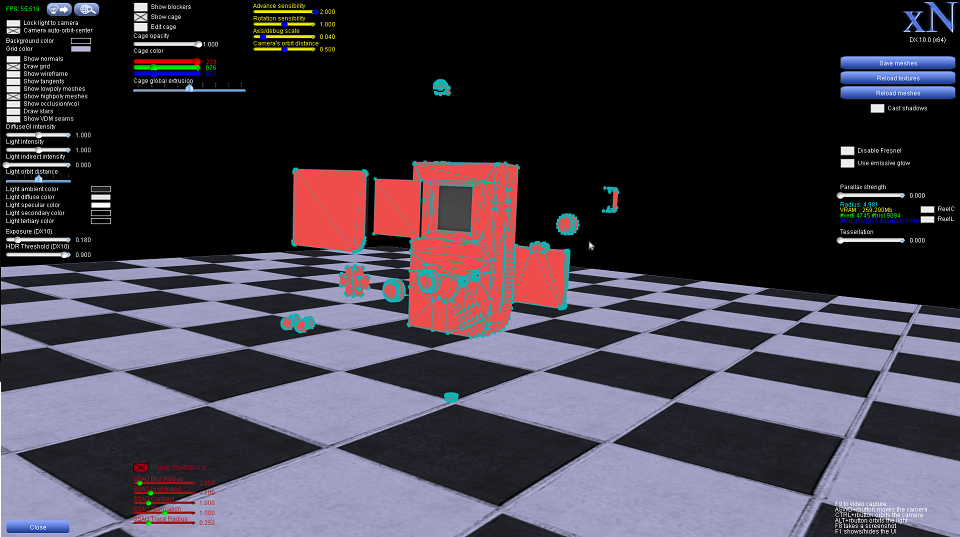
For texture baking, I decided to use xNormal. I know, it is a quite dated software, but I choose it because it gives me a slight better result than Blender, it's reliable, and it's free. First I "exploded" the mesh in its different parts to avoid overlapping results during the bake, the second step was to export the high poly and low poly version of the model in two separated obj files. Then, right within xNormal, I created the baking cage.
After using the xNormal's included tools to precisely calculate the right ray distance between the high and low poly model, I then set up the baking option to export a Normal, Ambient Occlusion and Curvature map in a 4k resolution for maximum quality. Once done, I checked the textures importing them in Blender. For some fine details (like the volume/phone/on-off text etc.) I decided to model some floaters (“floaters” are small details that are placed on top of a 3D object, in this case a plane, in a way that it seems like they are connected to that object in order to create the illusion of depth in the object they are placed on) in a different blend file.
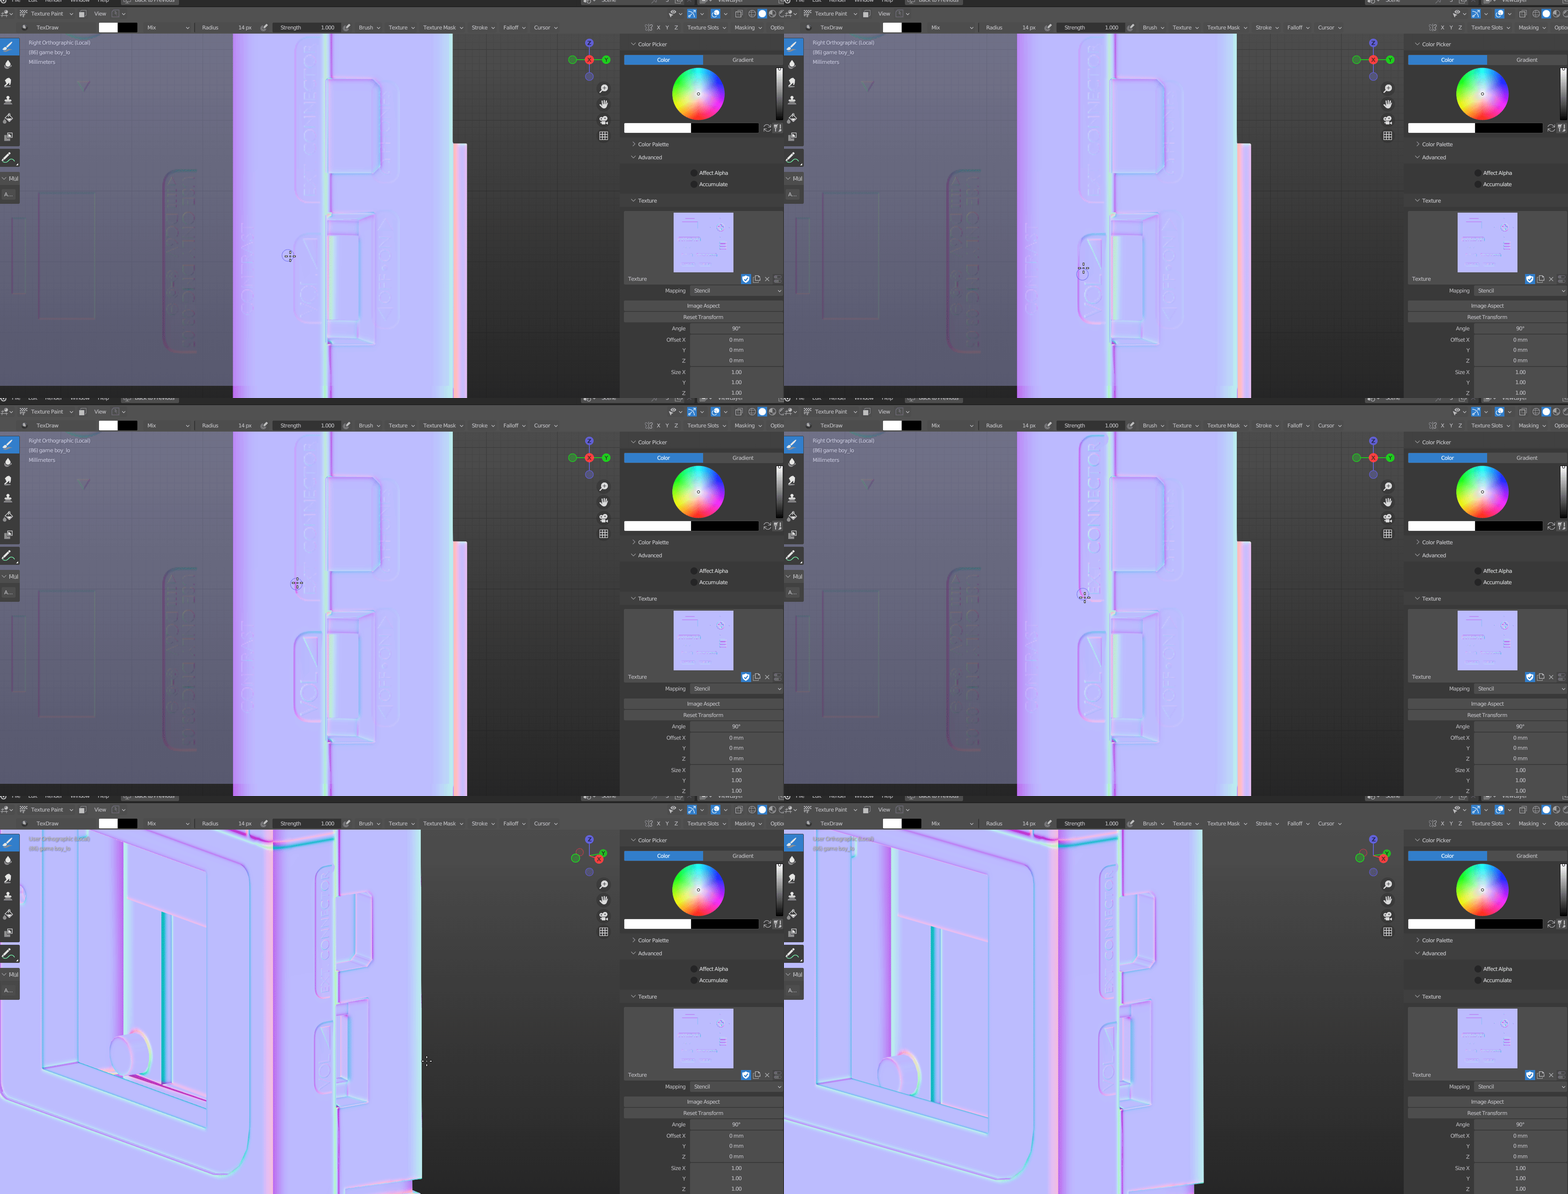
I then baked the result in a new normal map. This was then used to modify the one baked from the high poly model, using Blender's texture painting tools. This allowed me to add those small details quickly and easily.
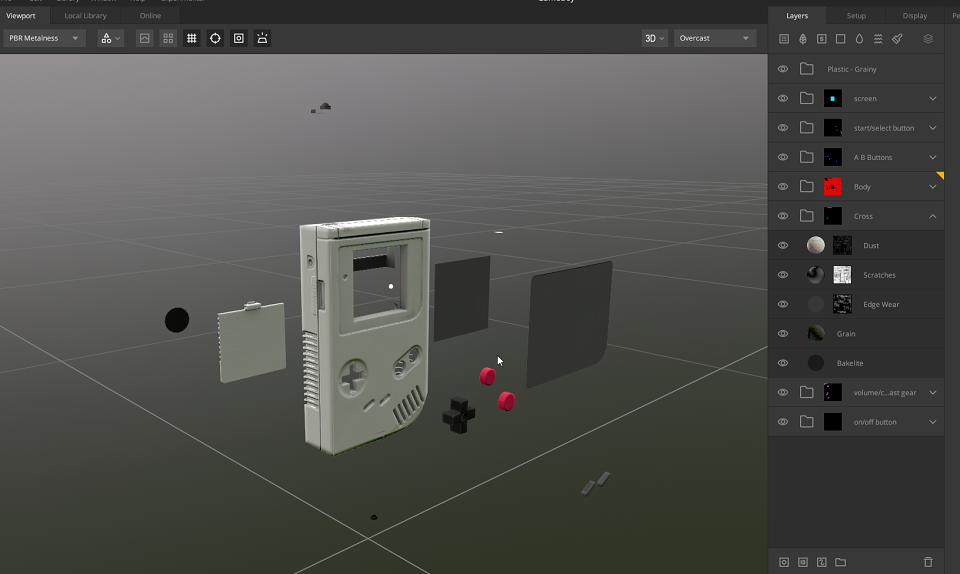
One more step before starting with the creation of the materials was to create an ID map to separate the different elements of the mesh with different colours. This will allow us to separate easily the materials once imported into Quixel Mixer.To create it, I simply assigned a colour to each element using vertex paint, and then baked the map using the emission option in Blender.
I then extracted the text from one of the reference picture and added it to the model using Blender's Texture Paint mode again.
GAME CARTRIDGE
The Game Boy can't work without a game cartridge (and batteries, of course, but we can pretend they are already inside their slot) so I also created a Wario Land cartridge using the same workflow.
'Why Wario Land?' you may ask. Well, Wario Land was one of my favourite games when I was a kid, and I remember playing so much I completed all three save slots at 100% (too bad there weren't achievements at the time, I would have got the platinum trophy!). Plus, Wario is one of my favourite Nintendo character and my main in Mario Kart 8.
ANIMATION
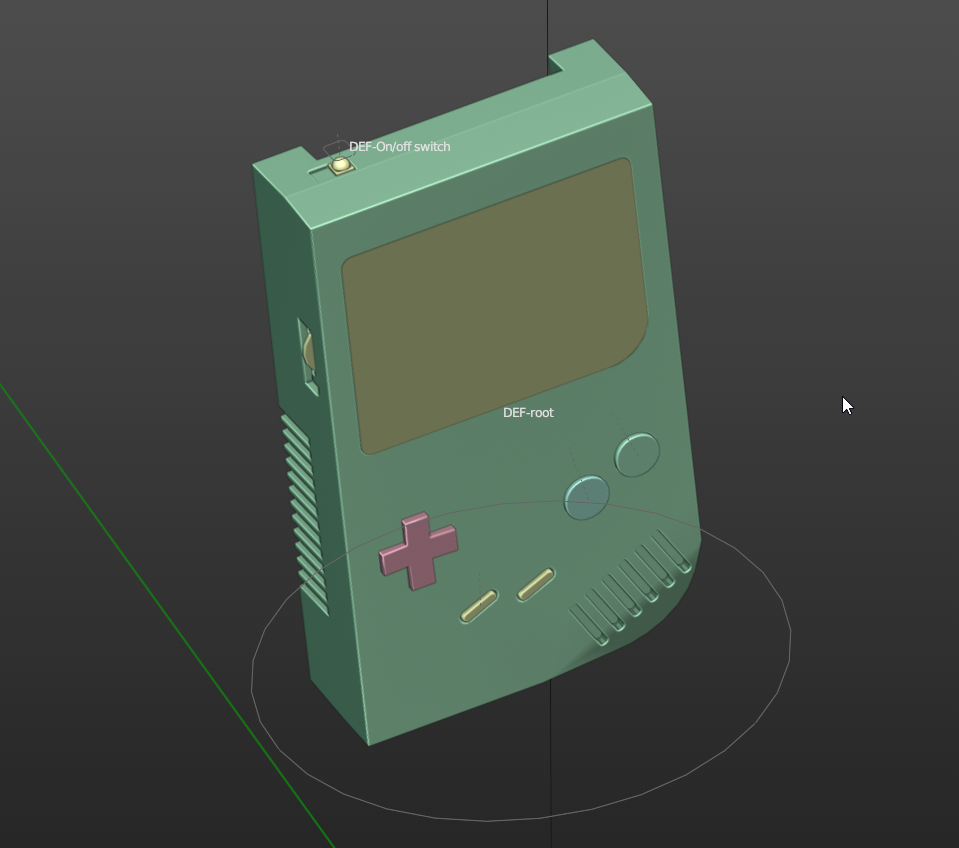
Once both models were ready, I thought of a simple product presentation-like animation. After sketching a very messy storyboard on a piece of paper laying around my desk, I did a super simple rig to control the whole model with a root bone and the on/off switch with some bone constraints to limit its movement and keep it in its place.
Since my idea involved the Game Boy to be turned on, I created a simple driver to link the led light to the on/off switch, so every time the switch moves to the right, the light led turns red as it would do in a real Game Boy.
I then created a new blend file dedicated only to the animation and I linked both the Game Boy and the cartridge file. Using Blender's file linking let me keep the models and the animation independent from each other, so if I have to modify the model for whatever reason, I can go back to the original file, make the changes and find the updated version in the animation file. Once the models have been imported I set up the camera, a three point (plus one) light setup and done the animation through keyframes and curve editing.
COMPOSITING
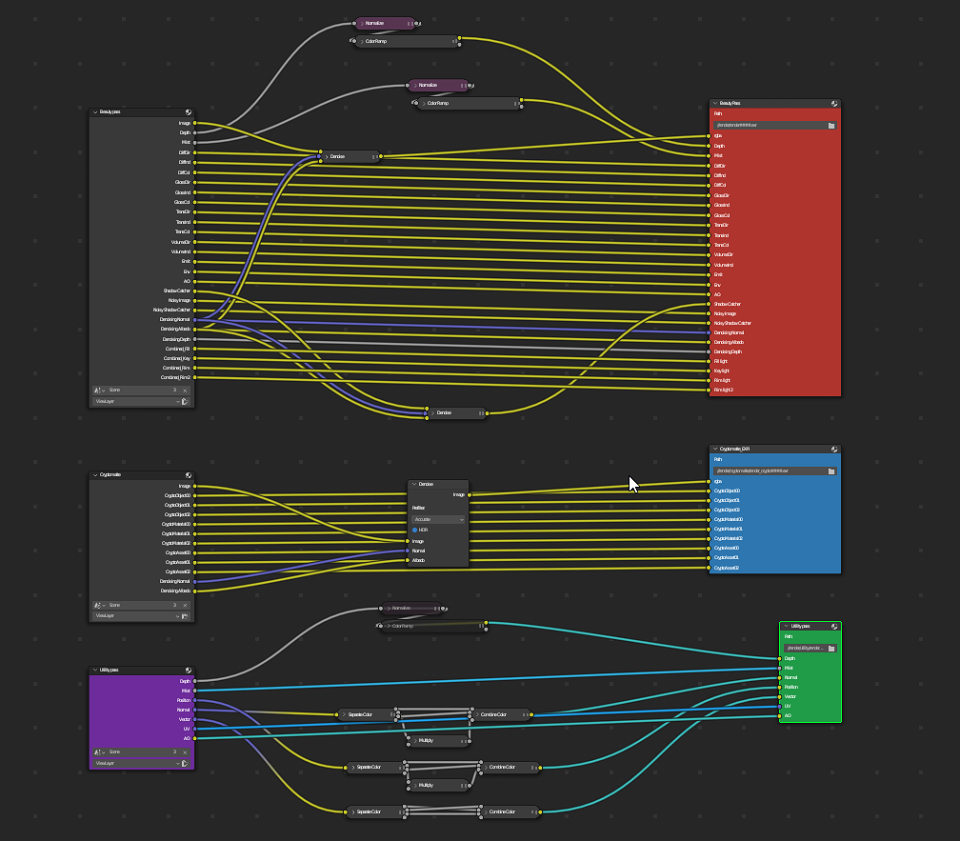
Once I'm satisfied with the animation, before the final render I set up some render passes to use later for compositing. My setup of choice is having three different type of render: a Beauty Pass (with light groups), an Utility Pass and a Cryptomatte Pass.
With the beauty pass I can isolate a specific element, such as diffuse lighting, shadows, reflections, or specular highlights. By having separate passes, I can adjust each element independently to enhance or modify its appearance, resulting in greater control and creative flexibility. The utility pass contains useful data such as UVs, Z-depth, mist, normal and vector and can be used to achieve a wide range of effects like depth of field, motion blur, selective colour correction, material masking and so on.With the Cryptomatte pass I can efficiently create and extract object or material mattes allowing me to easy select and manipulate specific elements during compositing.Render passes give flexibility, control, efficiency, and enhanced realism during the compositing process. They enable targeted adjustments, faster rendering, iterative workflows, and the generation of different versions of the final image. Ultimately, render passes play a vital role in achieving high-quality and visually appealing results in visual effects and animation.To efficiently store those passes and also keep the best quality, I export the animation in OpenEXR MultiLayer format.
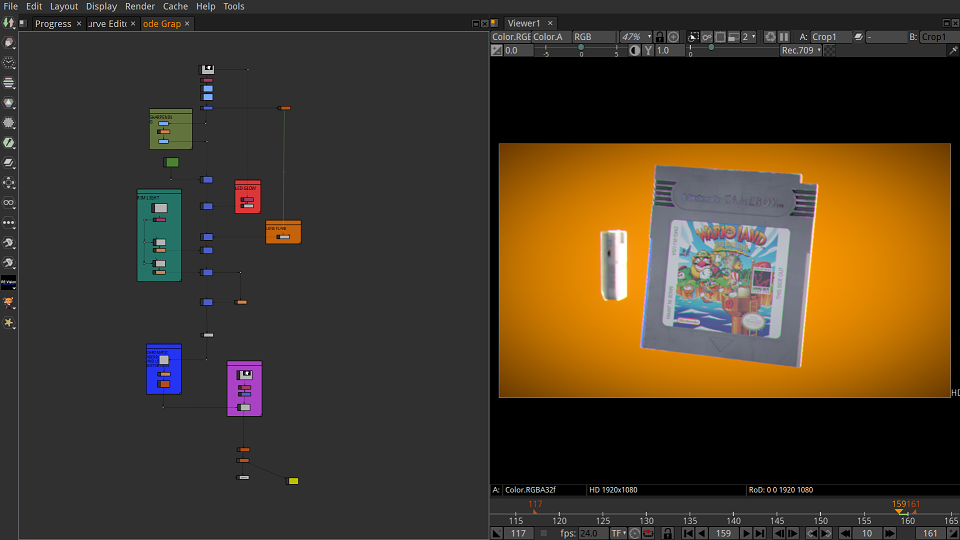
For compositing, I used Natron, another open source and free software that in terms of concept and functionality is similar to the Foundry's Nuke.
Using compositing, I could add the background, add lens flare effects, add glow to the red led light (using the emission pass from Blender), do a simple colour correction, add a subtle coloured rim light using the Normal Pass and using the Vector Pass I added motion blur. Chromatic aberration and lens distortion were the final touches to add realism to the whole scene.
BONUS:
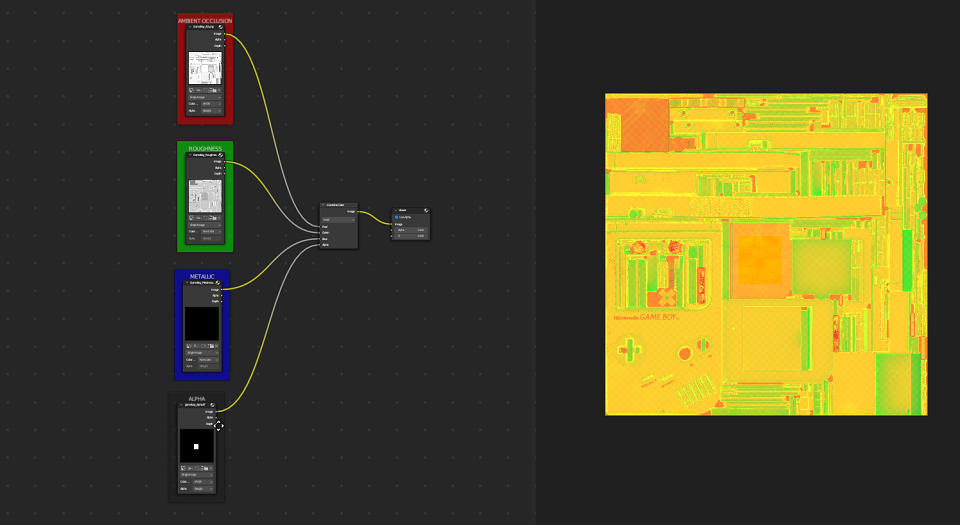
Using Blender compositor, I packed Ambient Occlusion, Roughness, Metalness and alpha maps into the R,G,B and A channel of the image respectively, obtaining a single texture instead of 4. This will make the model optimized for a Game Engine Like Unity, Unreal or Godot. Games use the channel packing technique to avoid loading separate grayscale images, which saves memory.
MADEIT CREDITS
-

Danilo Di Falco3D Generalist