A Cinemagraph is a looped gif in which only a small part of the image is animated whilst the rest is motionless. They are a great way to add subtle details to what appear to be static images. In fact, they are not images at all but videos manipulated in Photoshop.
The technique for creating them is relatively simple and we outline this below. The real skill in creating a seamless Cinemagraph without too much post-production is in the selection of the right video. Here are a few pointers:
- Choose a video that has a static camera viewpoint
If the camera is panning or zooming, then the part you want to be animated will be out of sync with the static frame used for the rest of the image. For example. if you want to animate a woman’s hair fluttering in the breeze, then she needs to be in the same position for the length of the animation otherwise her hair will follow the pan of the camera while her head & body stay still.
- Choose an element that is easy to loop
As a Cinemagraph is a looped GIF, the element you choose to animate has to loop seamlessly. The easiest elements for seamless merging are things like reflections (e.g. a boat on water), small circular movements (e.g. someone clapping), continuous motion (e.g. falling water) and on/off actions (e.g. a flashing light). You can choose anything to be animated but if you can’t get it to loop seamlessly it will jar and ruin the effect.
- Choose an animated element that works with the static frame
This sounds obvious but you can’t have elements moving in front of or behind the animation if you want it to appear natural and seamless. Again for example, if you choose to animate a woman’s hair blowing in the breeze and someone walks behind her then that will appear briefly in the animation and ruin the effect.
- Less is more
From a creative point of view the subtlety of the effect gives it power. You want people to feel like they are looking at a static image and the animated element adds surprise and delight. If you over animate it will just look like a standard animated GIF.
Now you’ve chosen your video and have identified your static frame and the element you want to animate, use this step-by-step guide to create the Cinemagraph in Photoshop:
1) Download your chosen video in a format that is compatible with the “Video Frames to Layers” function in Photoshop (compatible formats can be found in the “File Type” field. You may need to re-encode the video if the compression isn’t supported)
2) Open Photoshop, go to: FILE > IMPORT > Video Frames to Layers | and select the file
3) In the pop up below, choose the part of the video you want to use by ticking “Selected Range Only” and choosing your range (there is a limit of 500 frames). You can reduce the final file size of the animation by ticking “Limit To Every” and choosing a frame limit (e.g. every 2 frames means frames 1,3,5,etc will be selected)
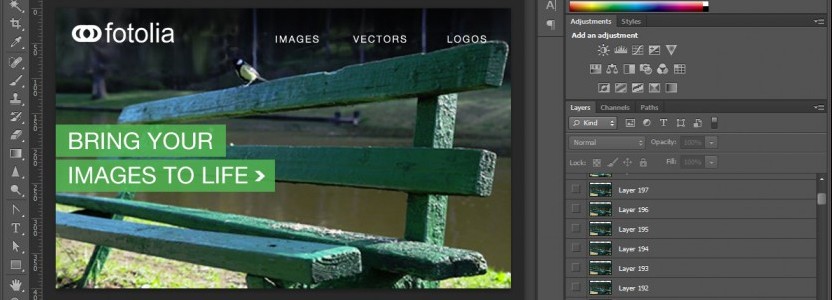
4) Click OK to import the video and you will now see each frame as a layer, see below.
5) Turn on the “timeline” window from Window > Timeline and you’ll see your timeline appear with one frame of animation, see below.

6) Before you start creating the animation, duplicate the first layer and cut out the area that you want to be animated. This will be your static image and the cropped area will be the window through which you can see the animation, see below.
7) Hide this first layer for the moment
8) Now you can start to create the animation from the second layer. The best method is to find a natural loop within the video that has the same start and end point. If that isn’t possible, you can also mirror the animation to create a loop e.g. take frame 1-10, duplicate them all and reverse their order for frames 11-20 making sure you remove any duplicate frames that are next to each other.
9) When you are happy with the loop, simply turn on the first layer and make sure the entire animation can be seen through the window you created on the top layer. If not, just adjust the window to accommodate the whole animation.
10) Save, export as an animated gif and use your Cinemagraph to bring your designs to life!


