

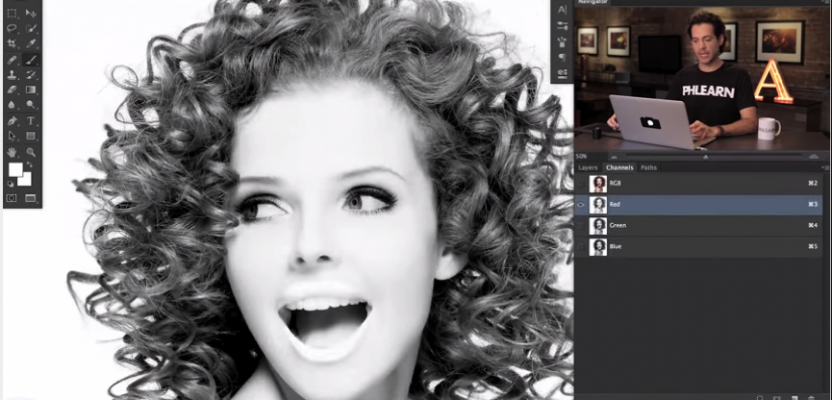

Many of you familiar with Photoshop will know the difficulties that can come with cutting out hair in Photoshop - especially when it's slightly unruly or in mid-'swish'.
The guys over at Phlearn, the photoshop tutorial website have produced a dedicated, in-depth demonstration on how best to achieve the process using Fotolia images:
Here's the background from Phlearn's Aaron Nace to watch in tandem with the video:
When cutting out hair from a background, it is helpful to keep in mind that it’s much easier to use dark hair against a light background or light hair against a dark background.
Selections
To start, find the color channel which shows the maximum amount of contrast in the hair.
Duplicate that channel and bring up the levels panel (CMD/CNTL + L). We can bring the black point up to create very intense contrast in the image. The darks should be extremely dark but be sure not to overdo it! A good way to check is if the edges of the hair look too coarse, you can decrease the darkness a little bit.
All of this is done in the channels tab, but it needs to be turned into an actual usable selection. Hold CMD/CNTL and click on your channel copy. This selection will remain, and you are able to go back into the layers and edit from there. Click on the layer mask icon, and everything that was dark will turn invisible. All you have to do is invert the selection (CMD/CNTL + I). If parts of the image are transparent that shouldn’t be, you can paint over the layer mask where it needs to be filled in.
To take care of fringing (light or white part around the edges of the hair), clipping masks will come in handy!
-Create a new layer
-Right click, and select “create clipping mask”
-Use the brush tool or clone stamp tool to fill in the white areas
Now, whatever work is done on that layer will only apply to the underlying layer. In other words, your new layer is clipped to what’s under it.
Change the clipped layer from normal to darken- this will only effect the whitest part of the hair. Use the clone stamp tool to paint over the light parts of the hair.
Thanks to Phlearn for sharing the video with us and choosing Fotolia for its images. For more of their fantastic tutorials check out their YouTube channel.