
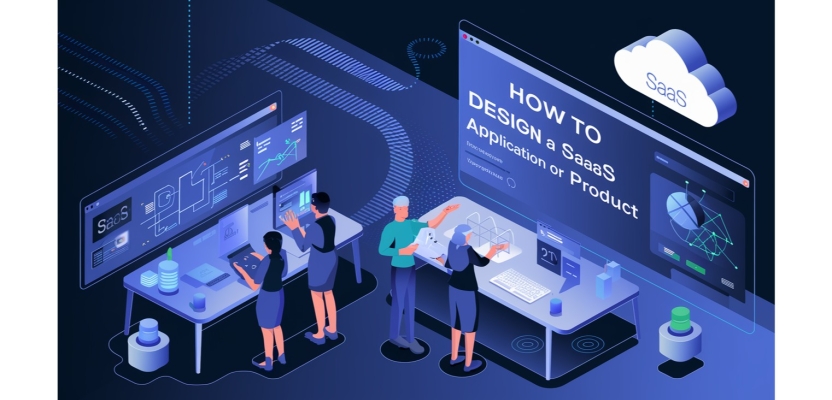

Software as a Service (SaaS) is transforming the way businesses operate. A single subscription to a SaaS application can replace the work of an entire department. SaaS apps provide access to software that was previously available only to large companies due to high infrastructure and maintenance costs.
Small businesses and startups can access essential services like email, file storage, expense tracking, purchasing, etc., at significantly lower costs than traditional IT solutions. By using the right SaaS solutions, businesses can reduce operational costs and concentrate on their core products and services instead of managing complex software systems or coordinating between multiple departments.
In this article, we will outline the key steps involved in designing such successful and easy-to-use SaaS applications. We will cover aspects such as understanding user needs, defining app features, creating a user-friendly interface, and more.
How to Design a SaaS Application or Product in 15 Clear Steps
Step 1. Ideation
Plan out a tool or service. Frame up the problem you want the SaaS solution to solve. Explain who the tool is for and how you want to go about developing it.
Step 2. Analyze Market Conditions
It all starts with a big idea, a problem we want our SaaS app to solve. But are you solving a problem that is already been solved? Is the problem unique to that one person and therefore unprofitable to build a solution that helps others? We can only know if we analyze the market we’ll be playing in.
-
Talk to as many potential customers as possible, especially those with budgets to pay for the solution you are envisioning.
-
Develop fictional characters that represent different customer segments your product targets.
-
Form a group of strategic customers to provide ongoing feedback.
-
Document all features and solutions that the current market is yet to address effectively.
Step 3. Conduct Competitive Analysis
Learn about the key players in your industry, especially those with entrenched positions.
-
Search for screenshots shared by customers of competitor products to understand how they visualize complex themes.
-
Review competitor websites to understand their target markets, strategies, and customer testimonials.
-
Inspect the HTML source of competitor pages for hidden keywords and phrases that indicate their focus areas.
-
Look for industry-specific terms to see who is advertising and ranking organically for the SaaS field you are targeting.
Keep competitive analysis within a small team to ensure focus and integrity. Stay alert for new, similar entrants that may disrupt the market.
Step 4. Define the Problem You’re Trying to Solve
Identify all the problems your SaaS app will address. Concentrate on a specific problem to solve. This focus allows you to excel in one area before tackling adjacent issues.
-
Once you identify a potential solution, validate your hypothesis via user research and testing.
-
Find market gaps that no one is addressing or where current solutions are inadequate.
-
If many people consistently ask for a product or service, take note.
-
Identify industries where products have become overly complicated - simplified solutions may meet unaddressed needs.
-
Assess whether the market is growing faster than current providers can meet demand - if so, there may be room for new entrants.
Step 5. Define the Value Your SaaS App Will Provide
Clarify the value of your SaaS product:
-
Highlight how your app automates repetitive tasks or reduces errors.
-
Explain how your app offers insights through data aggregation.
-
Illustrate how your app enhances daily living for users.
Maintain a focus on achieving market fit - if the product does not meet user needs, it will not succeed regardless of pricing.
Step 6. Create a SaaS App Roadmap
After defining your product vision and strategy, identify both short-term and long-term goals for your product. Short-term goals should focus on immediate tasks, while long-term goals should outline where you want to be in the future.
Once you have defined your goals, prioritize the features and tasks necessary to achieve them. Use a feature-based roadmap to categorize tasks by importance. Set realistic timeframes for each task and the overall project. This includes deadlines for individual tasks and an overarching timeline for product launch. Having clear deadlines helps keep the team accountable and ensures that progress is made consistently.
Select a roadmap tool that fits your team’s needs. Here are some popular options:
-
Aha!: A comprehensive tool designed specifically for product management, starting at $59/user per month
-
Craft.io: Ideal for larger teams, starting at $39/user per month
-
Productboard: User-friendly with a starting price of $20/maker per month
-
Product-Plan: Starts at $39/editor per month, free for viewers
-
Canny: Focuses on customer feedback and analysis
-
Monday.com, ClickUp, Asana, Wrike, Zoho, and Airtable also offer templates specifically designed for roadmaps
Share the roadmap with all stakeholders regularly. Periodically review the roadmap to ensure it remains relevant as market conditions change or new information emerges.
Step 7. Create Low-Fi and Mid-Fi Wireframes
Create paper wireframes to visualize your SaaS app’s structure and key functionalities. Simulate user journeys and show the different pages inside the web app in the sketches. Once you have finalized the SaaS app’s basic layout, functionality, and key workflow, the transition from paper sketches to digital wireframes.
Use tools like Moqups, Whimsical, or Balsamiq to create a low-fidelity, clickable wireframe. Visualize the user flows and navigation patterns in these wireframes. Observe test users interacting with the clickable wireframe. Optimize their journeys for speed and convenience.
Step 8. Decide the SaaS App’s Visual Design
Now, finalize your SaaS app’s visual design elements.
-
Choose readable and attractive fonts.
-
Select a brand-friendly color palette.
-
Use clear, recognizable icons.
-
Design tapable buttons that are visually distinct.
Combine these elements to form a cohesive and engaging web app interface.
Step 9. Finalize the SaaS App’s Navigation
Avoid using complex or unconventional navigation structures. Provide straightforward pathways to key sections via a single, accessible menu. Use clear labels for each section or category. Keep sign-up, registration, search options, checkout, and the home menu uncomplicated.
Step 10. Create a SaaS Design Minimum Viable Product (MVP)
Now that you have finalized your web app’s main visual and navigational elements - create a clickable, high-fidelity Minimum Viable Product (MVP) with tools like Figma or Adobe XD. Improve upon your previous wireframes by making this one closely resemble the final product you are envisioning. Include all user journeys, navigation structures, and UI elements.
Add color schemes, typography, functional interface elements (like form fields), and minor animations, to this wireframe as well. Once the MVP clearly represents your SaaS app’s visual and functional identity, present it to stakeholders and test users. Collect feedback on what to change and what to retain.
Step 11. Optimize Onboarding, Sign Up, and Login Pages
Creating a seamless sign-up and login process is crucial for user retention. So, pay special attention to designing these pages.
Avoid asking for unnecessary information that could deter users from signing up. Provide a free trial without requiring credit card information, and remember to keep the sign-up steps simple and avoid lengthy forms. Include a completion bar to help users track their progress. Also, introduce chat support for users who need assistance during onboarding.
Step 12. Add Gamification
Once your MVP has been validated by test users add subtle game mechanics to certain sections of the UI. For example, you can add tracking and monitoring features that reward users for making specific achievements within the SaaS app.
Step 13. Finalize All UX Writing within the App
Good UX writing is crucial for helping users navigate and interact with your SaaS app effectively. Well-crafted UI copy informs users about interface functionalities, while a clear menu copy ensures smooth navigation. Thoughtfully designed button copy encourages desired actions, ultimately boosting conversions. Additionally, well-written error messages assist users in troubleshooting issues, preventing frustration and improving the overall experience.
Instructional text plays a key role in guiding users through different processes within the software, making complex actions feel intuitive. By maintaining clarity, consistency, and a user-friendly tone, good UX writing shapes every interaction within the app, enhancing usability and engagement.
Step 14. Finalize the SaaS App’s UI Design
Follow the minimalist design trend by selecting a two-color palette with an accent color. Ensure all icons look clean and professional.
Step 15. Launch, Test, Refine
Hand over all design assets and documents to the development team. Once they develop your SaaS app, test it in-house before releasing it. Only release it after the app works as intended with no bugs. Then, keep collecting user feedback and keep revising the design as per their needs.
Conclusion
Launching new SaaS products is always a challenging endeavor, regardless of how much planning goes into it. Several hurdles can arise, such as diverting focus from the core mission and product, underestimating costs associated with UX research and user testing, or overestimating market potential. Additionally, regulatory changes, unexpected sales cycles, and scope creep can further complicate the process, making it harder to achieve a successful launch.
This is why investing in high-quality, professional SaaS design services from the outset is a smart decision. Experienced professionals can help navigate these challenges, ensuring compliance, refining user experience, and keeping the project on track. By addressing potential risks early, they help streamline the development process and increase the likelihood of a successful product launch.