

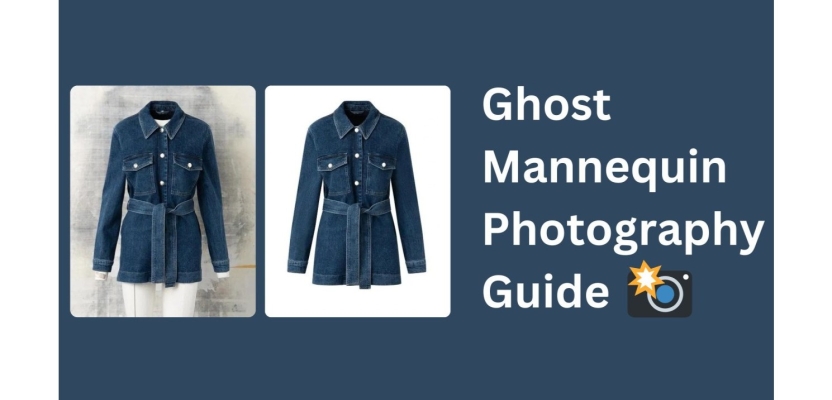

Ghost mannequin photography has revolutionized the way e-commerce brands showcase clothing, creating an illusion of floating garments that perfectly highlight the product without distractions. It’s a highly effective method for online retailers, as it allows customers to visualize the fit and structure of clothing in a way that’s clear and appealing. In this comprehensive guide, we’ll cover everything you need to master ghost mannequin photography for clothing products, from equipment essentials to post-production tips.
1. Understanding Ghost Mannequin Photography
What Is Ghost Mannequin Photography?
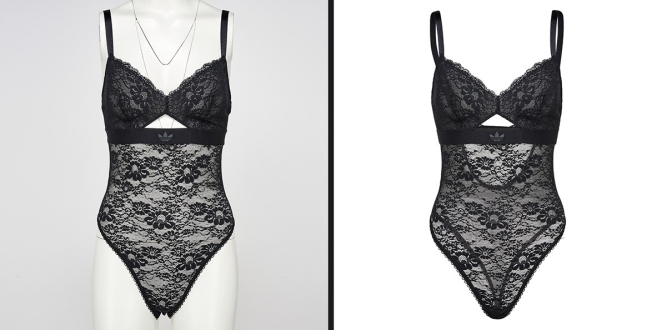
Ghost Mannequin Effects Before And After
Ghost mannequin photography (also known as invisible mannequin or hollow-man photography) is a technique where a product is photographed on a mannequin, and then the mannequin is digitally removed in post-production. This leaves a lifelike image of the garment as if it’s being worn, without any visible support. The result is a captivating, clean presentation that helps customers focus on the garment’s details.
Benefits for E-commerce
Ghost mannequin photography highlights the garment's form without distractions, enabling consumers to visualize how it might look on them. This approach not only enhances the shopping experience but also reduces return rates by providing more accurate product representations.
2. Essential Equipment for Ghost Mannequin Photography
Cameras and Lenses
Investing in a DSLR or mirrorless camera with manual settings is ideal for ghost mannequin photography. A lens with a focal length of 50mm to 100mm works best to capture full shots of garments without distortion.
Lighting Setup
Natural light can work, but for consistency, softbox lighting is recommended. Using at least two to three lights—one main light and two fill lights—ensures the garment is evenly lit without harsh shadows.
Mannequin Types and Choices
Choose a mannequin that aligns with the style and fit of the garments. Mannequins with removable parts, like the chest, arms, or neck, allow you to photograph multiple sections of the garment to create the invisible effect in post-production.
3. Setting Up Your Studio
Creating an efficient studio space is key for capturing professional-looking ghost mannequin photography.
Preparing Your Space
A clean, minimal studio with a white or gray background will keep the focus on the product. Setting up a backdrop or a portable studio background works well.
Positioning Mannequins and Clothing
Properly aligning the mannequin and garment is essential for achieving a lifelike, dimensional look. Center the mannequin to the camera and ensure it’s stable before starting the shoot.
4. Choosing the Right Clothing and Mannequin Positioning
Each type of garment requires different handling to achieve the best ghost mannequin effect.
Tips for Tops and Dresses
For tops and dresses, removing the neck section of the mannequin allows you to capture a clean neckline. Ensuring the fabric lies smoothly and arranging the sleeves naturally is important to avoid a stiff look.
Strategies for Pants and Bottoms
When shooting pants, ensure that the waist and leg areas are properly aligned and supported. For more definition, stuff tissue paper or fabric into the waist to mimic a natural shape.
5. Lighting Techniques
Lighting can make or break your ghost mannequin shots, so use controlled lighting for a polished look.
Best Practices for Brightness and Shadows
Ensure that all shadows are soft and avoid harsh lighting that may obscure details or textures. Diffused lighting can bring out details in the fabric without causing glare or highlights.
Light Diffusers and Reflectors
Using diffusers or softboxes helps spread light evenly over the product, while reflectors can fill in darker areas. Proper lighting will minimize the amount of editing needed later.
6. Step-by-Step Shooting Guide
This section provides a comprehensive guide for setting up each shot to achieve consistent, professional results.
Adjusting Camera Settings
Use a narrow aperture (around f/8 or higher) for greater depth of field. Lower ISO values help avoid grainy images, and a shutter speed between 1/60 and 1/125 should work well with a tripod.
Positioning Garments for Optimal Effect
Position the garment carefully on the mannequin to ensure symmetry and balance. Pay attention to small details, like aligning seams and straightening collars.
7. Post-Production Essentials
Editing is where the magic of ghost mannequin photography happens.
Basic Edits in Adobe Photoshop or Lightroom
Adjust the exposure, contrast, and color balance to ensure the image is clear and vibrant. Correct any imperfections in fabric, such as creases or color discrepancies.
Removing Mannequin Parts
Using the pen tool or magic wand tool in Photoshop, carefully mask out and remove visible parts of the mannequin, focusing on creating clean edges around the garment.
8. Creating the “Invisible” Effect in Editing
Achieving the ghost mannequin effect involves merging multiple images to create the final, floating look.
Merging and Masking Layers
Combine images of the main garment, interior label, and neck area using layer masks. This allows you to reveal and conceal parts of each layer to create a 3D effect.
Perfecting the Seam Lines
Refine the seams to look natural by smoothing edges and aligning layer boundaries accurately. This process helps create the illusion that the garment is worn but hollow.
9. Tips for Capturing Different Garment Types
Different types of clothing can require unique considerations.
Jackets and Outerwear
Ensure sleeves and collars are symmetrical and free of wrinkles. For bulky items, consider using a mannequin torso that fills out the shape naturally.
Lingerie and Swimwear
For these types, a mannequin with an invisible chest or leg insert allows you to capture delicate garments effectively without showing the mannequin.
10. Common Mistakes and How to Avoid Them
Incorrect Lighting
Uneven lighting can cause shadows that make editing difficult. Ensure even illumination across the entire garment.
Poor Fitting of Garments
Loose-fitting garments can look sloppy. Pin clothing at the back to create a snug fit if necessary.
11. Optimizing Images for E-commerce Platforms
When your images are ready, optimizing them for online display is crucial.
Image Size and Resolution
Aim for a resolution of at least 2000 x 2000 pixels for clarity when zoomed in. Maintain a balance between image quality and load speed by keeping file sizes manageable.
File Formats and Compression
Use JPEG for compatibility across e-commerce platforms, and consider compressing files to reduce loading times.
12. Advanced Editing Techniques for Flawless Finish
For a professional touch, advanced editing techniques can elevate your images further.
Clipping Paths and Deep Etching
This technique ensures clean, sharp edges around garments, making them stand out more effectively on a white or transparent background.
Adding soft shadows under or around the garment can give it depth, making it look more realistic and dimensional.
13. Cost Considerations for Ghost Mannequin Photography
Ghost mannequin photography requires investments in equipment, software, and time. Budgeting for quality gear and editing software is essential to ensure professional-quality results.
14. DIY vs. Professional Services
Weighing the pros and cons of DIY versus hiring professional services can help decide what’s best for your brand.
15. Conclusion and Best Practices
Ghost mannequin photography can significantly elevate your clothing products' appeal on e-commerce platforms by offering customers a clean, detailed view. Following these techniques and refining your skills will ensure your images consistently stand out.