


Final Cut Pro is loved by many filmmakers. It has many powerful and useful features that many people have overlooked. Due to Apple’s attempt to keep the interface very organised and clean, many people don’t know where to find certain tools so here’s a few Final Cut Pro Tips that maybe you didn’t know about. Also, looking for music for your production? Browse 1000's of tracks in the Cinephonix library, perfect for video.
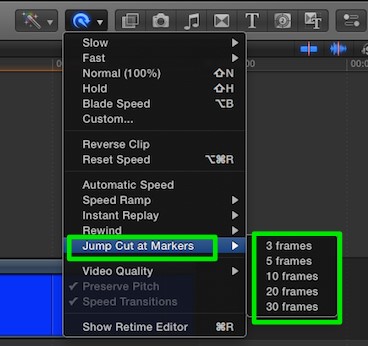
1. Jump Cut Markers This is useful if you want to jump cut a number of times within the same clip. The traditional way to do this is to cut up a single clip multiple times and then slip the edit of each of the following clips a number of times to achieve the effect. However, this can be very time consuming. Final Cut Pro allows you to simply add markers to your clip in the spots that you want it to jump cut and then selecting jump cut markers from the retiming menu. You can also identify how many frames you want it to jump by. This is a much quicker method.
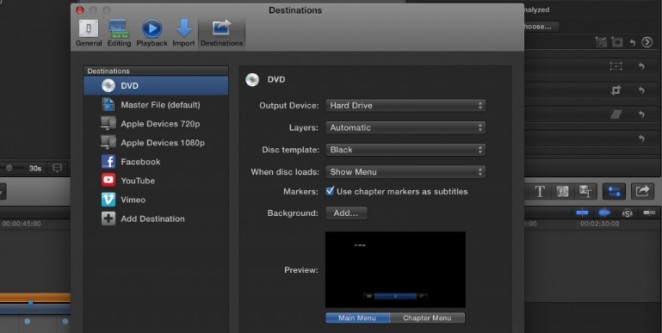
2. Using markers as subtitles. There are many things you can do with markers, following on from using them as jump cuts. You can also use them as subtitles. Apple kept things simple by allowing us to opt into using chapter markers as subtitles when outputting in certain formats. The main thing you need to remember when using markers is to make sure that you’re using chapter markers as oppose to standard markers. When outputting your video to DVD, select the option ‘use chapter markers as subtitles’ in the share window in order to use the feature.
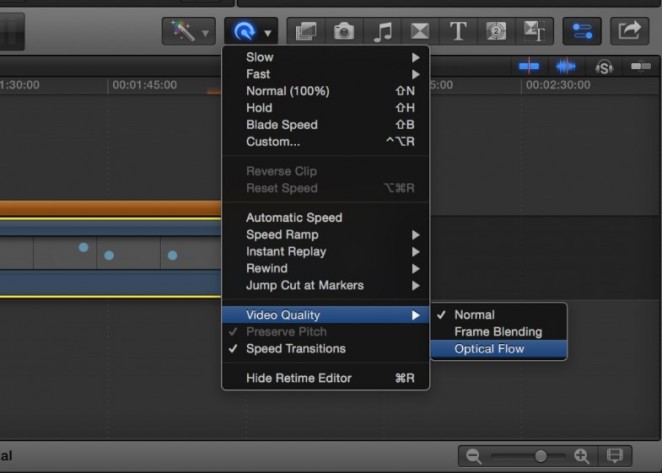
3. Optical Flow Optical Flow is great if you’re wanting to do slow motion or speed work. It enables you to slow down your footage with high quality results. It essentially creates new frames by inserting the surrounding frames in a clip – this allows the clip to be slowed down further than it normally should be. Final Cut Pro analyses the clip in the background and applies the slow motion effect so you can use your clips in a different way.
4. Adjustment layers An adjustment layer is an empty later that can have effects, transitions, colour work etc added to it. They’re helpful if you want to test out an effect on your whole timeline. You can create an adjustment layer with the effect and have it span throughout the duration of the timeline. Using adjustment layers can also save time as you don’t have to make changes clip by clip. For example, if you wanted to change the colour on your project, you can just put it in an adjustment layerrather than modifying it on a clip by clip basis. The only drawback with this is that Final Cut Pro doesn’t come with the adjustment layers built in – you’d need to create one using Motion and then publish it to final cut.
You can get premium quality music for your video at Cinephonix. Buy now, use immediately.